
Home & Garden
Experts Reveal 7 Garden Habits Hurting Property Value


An attractive and well-maintained garden is one of the best assets a British property can have. It can boost your home’s overall market value by up to 20%.
However, maintaining it is an entirely different matter. A garden is a living and evolving space which requires consistent care, and while many homeowners invest significant time and effort, they often overlook how their daily outdoor routines impact their property’s bottom line.
Here’s what trusted Watford garden specialists don’t recommend you do because when a garden looks neglected or structurally compromised, it can turn off buyers on the spot.
Use this knowledge to protect your financial investment and ensure your outdoor space remains a genuine selling point rather than a costly liability.
1. Allowing Fast-Growing Invasive Weeds To Mature
It is remarkably easy to ignore a few rogue green shoots in the corner of a flower bed during a busy work week, but allowing invasive plants to take root is a critical mistake.
In the United Kingdom, certain aggressive species can cause severe structural damage to brickwork, drainage pipes, and patio foundations.
While Japanese knotweed is the most notorious offender, other common plants like ivy, brambles, and mare’s tail can quickly compromise garden walls and lift heavy paving stones if left completely unchecked.
When potential buyers spot these invasive species in your outdoor area, the financial fallout can be devastating.
Mortgage lenders are incredibly cautious about properties with documented history of invasive weed damage. Sometimes they refuse loans altogether until a professional eradication plan is legally guaranteed.
Consistently neglecting weed management also signals a broader lack of property maintenance. This immediately lowers emotional appeal and drives down the initial valuation offers.
2. Neglecting Severe Lawnmower Compaction And Poor Drainage
Mowing the lawn is a staple of British life, but doing it incorrectly can lead to long-term soil issues.
Walking over wet ground with heavy petrol lawnmowers compacts the soil, squeezing out essential oxygen pockets and destroying the natural structure of the earth.
When this is repeated throughout a rainy spring and summer without any active counter-measures, the lawn loses its ability to absorb rainwater naturally. This creates a permanently waterlogged, boggy mess.
As you can imagine, a persistently soggy garden is an immediate red flag for modern house hunters. Buyers see standing puddles, thick green moss, and slimy patio edges as clear signs of a failing drainage system.
Correcting severe drainage issues often requires installing expensive French drains or undertaking extensive landscaping, a financial prospect that can easily prompt buyers to demand a substantial reduction in the final asking price.
3. Leaving Broken Boundary Fencing Unattended
Leaving weathered, leaning, or completely broken fence panels untouched is a habit that severely damages a property’s first impression.
Fencing is exposed to harsh winter gales and constant dampness, meaning it degrades rapidly without regular care or the application of wood treatments.
Many homeowners view a loose panel or a rotting post as a minor aesthetic issue to fix later, however, it is one of the very first things a visitor notices when viewing a home from the street.
Boundary fencing serves two critical functions for buyers: security and privacy.
Families with young children or pets will immediately discount a property if the perimeter is broken or looks unattended, as they imagine the immediate stress and expense of replacing hundreds of meters of fencing upon moving in.
A fresh coat of high-quality exterior paint and structurally sound posts instantly make an outdoor space look better and feel more secure, loved, and private.
4. Over-Planting Massive Trees Too Close To The House
Planting beautiful saplings is a wonderful way to introduce colour and wildlife to your garden, but failing to research the mature height and root span of specific species can lead to immense financial damage.
A common habit among amateur gardeners is placing large trees, such as willows, oaks, or fast-growing conifers, within a few meters of the main property or neighbouring structures to create a quick privacy screen.
As these trees grow, their extensive, moisture-seeking root systems can snake beneath foundations, causing soil shrinkage and severe structural subsidence.
Furthermore, massive overhanging branches pose a direct risk during autumn storms, threatening roof tiles and guttering systems.
Surveyors look closely at the proximity of large trees to the building, and if they suspect foundation interference, insurers may raise premiums significantly, causing buyers to walk away entirely.
5. Accumulating Rotting Timber And Unused Garden Clutter
Allowing broken garden furniture, cracked plastic pots, old paving slabs, and decaying timber piles to gather in the corners of your plot is a habit that destroys spatial perception.
It often starts innocently as a temporary storage solution for leftover DIY materials, but over months, it transforms into an unsightly graveyard of clutter.
This accumulation drastically shrinks the perceived size of the garden, making a generous plot feel cramped, uninviting, and small.
Beyond the visual detriment, piles of rotting wood and domestic debris create an ideal habitat for pests, including rats and mice, which can easily migrate into the main house.
Buyers want to imagine themselves entertaining friends or relaxing on a clean patio, not calculating how many trips to the local tip will be required to clear away old rubbish. Keeping storage zones organized and clear is essential for maximizing market appeal.
6. Installing Poorly Positioned Or Outsized Storage Sheds
A high-quality garden outbuilding can add substantial value to a property, but dropping a cheap, oversized shed right in the middle of a modest lawn throws off the entire layout of the outdoor space.
Many homeowners choose a shed based solely on their immediate storage needs, completely ignoring sightlines from the main house windows or how the structure disrupts the natural flow of the garden.
An awkwardly placed structure chops the usable space in half, casts heavy shade across flower beds, and makes a small garden feel microscopic.
Furthermore, if an outbuilding exceeds legal height limits or is built right against a boundary line without proper permitted development consideration, it can trigger council enforcement issues.
Placing storage discreetly along existing fence lines helps preserve open lawn space and maintains a clean, harmonious aesthetic.
7. Committing Completely To Artificial Turf
In recent years, laying down artificial grass was heavily marketed as the ultimate low-maintenance solution for busy households. However, relying on plastic turf has quickly become a significant turn-off for a vast majority of modern property buyers.
Artificial lawns retain heat intensely during summer months, develop noticeable odours if used by pets, and present significant environmental and biodiversity drawbacks that conflict with modern green living preferences.
From a financial perspective, bad installations can lift at the edges, trap moisture underneath, and create severe drainage problems on top of the soil.
Savvy buyers recognise the hidden, substantial costs associated with lifting, disposing of, and replacing old artificial turf with a real, living lawn.
A genuine, neatly edged grass lawn remains the gold standard for property value, offering an organic, timeless appeal that synthetic alternatives simply cannot match.
Conclusion
To maximise your home’s financial potential, you have to look at your outdoor space through the critical eyes of a prospective buyer.
A garden should always feel loved and cared for, and like an extension of your living space. By doing so and fixing what needs fixing, you protect your property’s overall market value.
That way, when it comes time to sell, your garden will actively drive up competing offers and help secure the best deal possible.
Good luck!

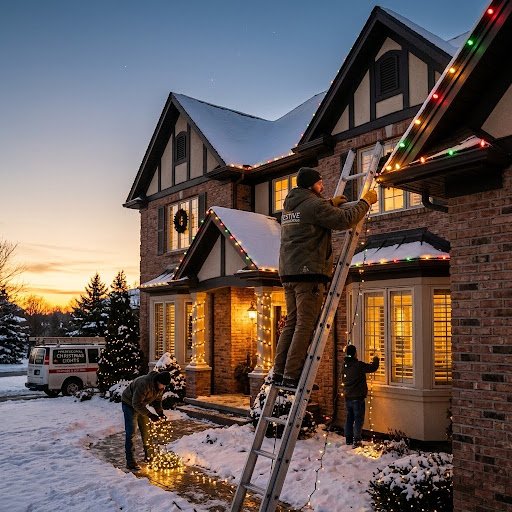
The holidays arrive fast. One moment you’re carving pumpkins, and the next, neighbors are already stringing lights across their rooftops. For many homeowners, decorating for Christmas is one of the season’s greatest joys—but the setup? That’s a different story entirely. Tangled wires, unstable ladders, burned-out bulbs, and hours of frustrating trial and error can strip the fun right out of it. That’s exactly where professional Christmas light installation changes everything.
Hiring a dedicated team to handle your holiday lighting isn’t just a convenience—it’s a decision that pays off in ways most people don’t anticipate until they’ve experienced it firsthand. From stunning curb appeal to zero stress on your end, the benefits go well beyond simply having a lit-up house.
What Makes Professional Holiday Lighting Worth Every Penny?
There’s a significant difference between hanging a string of lights from the hardware store and having a professionally designed display installed on your property. Professional installers bring commercial-grade lighting, custom-fit layouts, and a trained eye for design that transforms an ordinary home into a neighborhood landmark.
The results speak for themselves. Homes with professional lighting installations consistently draw more attention, create warmer atmospheres for guests, and hold up far better through rain, wind, and freezing temperatures than DIY setups. Commercial-grade bulbs are brighter, more energy-efficient, and built to last an entire season without constant maintenance.
Beyond aesthetics, there’s the safety factor. Every year, emergency rooms treat thousands of injuries related to holiday decorating—most involving falls from ladders. Leaving the job to trained professionals eliminates that risk.
How the Installation Process Actually Works
Professional Christmas light installation follows a clear, efficient process that takes the entire burden off the homeowner. Here’s what that typically looks like:
Initial Consultation and Design
A team visits the property to assess its layout, architecture, and landscaping. From there, a custom lighting plan is developed that complements the home’s unique features—rooflines, trees, columns, walkways, and more.
Custom Fitting and Installation
Unlike off-the-shelf products, professional-grade lights are cut and configured to fit the exact dimensions of the property. Clips, anchors, and fasteners are used correctly to protect gutters, shingles, and exterior finishes. No improvising, no guesswork.
Takedown and Storage
When the season ends, the crew returns to remove everything cleanly and store the lighting properly for the following year. Homeowners don’t lift a finger—or climb a single rung of a ladder.
The Curb Appeal Effect: More Than Just Pretty Lights
Well-executed holiday lighting does something subtle but powerful—it elevates how a property is perceived. Real estate professionals have long noted that exterior presentation influences how homes are valued, even emotionally. A beautifully lit home during the holiday season signals pride of ownership, warmth, and attention to detail.
For businesses, the impact is even more measurable. Retail locations and commercial properties with professional holiday lighting attract more foot traffic, create a welcoming atmosphere, and reinforce brand identity during one of the highest-spending seasons of the year.
Restaurants, boutiques, office complexes, and hospitality venues have all discovered that a polished exterior lighting display is one of the most cost-effective seasonal marketing tools available.
Why More Homeowners Are Choosing Professional Installers Each Year
The shift toward professional installation has been growing steadily, and it’s not hard to understand why. Time is increasingly precious, and the holiday season is already packed with travel, gatherings, shopping, and everything else that comes with December.
Spending an entire weekend on the roof to achieve a result that still looks a little uneven is a hard sell when a professional team can deliver a stunning, symmetrical display in a matter of hours. Homeowners are making the same calculation and coming to the same conclusion: the experience is simply better when it’s handled by people who do this every single day.
There’s also the matter of equipment. Professional installers arrive with everything needed—lifts, specialized clips, lighting testers, and a full inventory of replacement bulbs. No last-minute hardware store runs. No discovering mid-installation that you bought the wrong type of light for your roofline.
The Right Team for a Display That Turns Heads
Not all installation services are created equal. The best ones combine technical expertise with genuine design sensibility, treating each property as a unique canvas rather than a one-size-fits-all job.
Christmas Light Installers brings professional-grade equipment, experienced crews, and personalized design consultations that help homeowners and businesses achieve showstopping results that make the entire neighborhood stop and stare during the most festive time of year. Whether the goal is a classic warm-white roofline or a full-color spectacular with trees, walkways, and wreaths, the team brings the vision to life—safely, efficiently, and beautifully.
Custom quotes are available, and the scheduling process is straightforward. Getting started early in the season is recommended, as installation slots fill up quickly once November arrives.
Make This Holiday Season the Best-Looking One Yet
The holiday season comes once a year. The impression a home or business makes during this time—on guests, neighbors, customers, and passersby—is worth investing in. Professional Christmas light installation removes the stress, eliminates the safety risks, and delivers results that simply aren’t achievable with a DIY approach.
This year, skip the tangled wires and the ladder wobble. Let the professionals handle it and spend that time on what the season is actually about: good food, great company, and a home that looks as warm and welcoming on the outside as it feels inside.

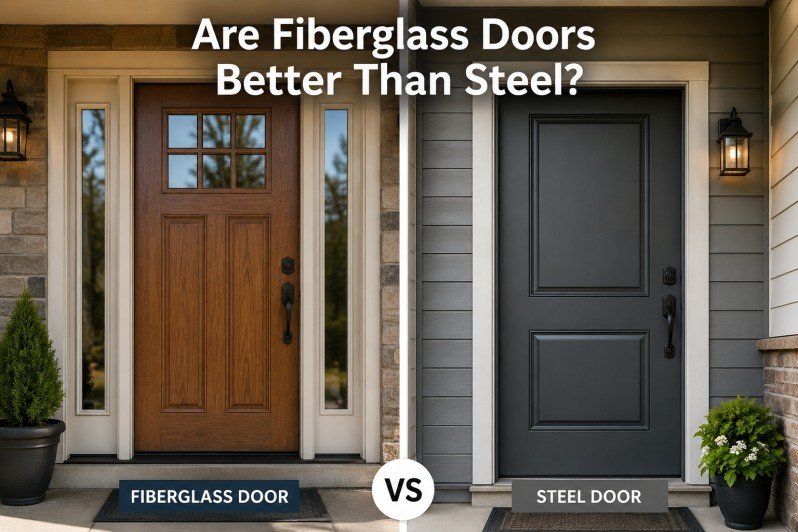
Fiberglass is not automatically better than steel. Homeowners comparing fiberglass doors with steel doors should first consider where the door will be installed, how exposed the entrance is and which finish they want.
Fiberglass is usually worth considering for a main entrance when a convincing oak or mahogany grain, stained finish, resistance to ordinary dents and no steel-skin rust risk matter. Steel often gives better value for a smooth painted, sheltered or secondary entrance.
The material name is only one part of the decision. Glass, frame construction, threshold, weatherstripping, hardware, exposure and installation can change which door is actually better for the house.
One of the most common comparison mistakes is treating “fiberglass” or “steel” as the complete specification. Two doors made from the same skin material can perform very differently once the frame, glass, sill, locks and installation are included.
Choose by the Entrance, Not the Material Label
| Project | Usual starting point | What can change the answer |
|---|---|---|
| Main entrance with a stained oak or mahogany look | Fiberglass | Quality and depth of the grain, finish warranty and total price |
| Smooth painted front door | Either | Panel design, glass, frame, hardware and exposure may matter more than the skin |
| Covered side, back or basement entrance | Steel | Heavy use, dent risk or a specific design requirement may justify fiberglass |
| Entrance exposed to regular rain, snow and moisture | Often fiberglass | The sill, frame, drainage and installation still control water around the opening |
| Door with large decorative glass, sidelights or a transom | Compare exact systems | Glass can affect price, energy performance, privacy and security more than the skin material |
| Eight-foot or double entrance | Compare exact systems | Frame rigidity, alignment, centre sealing and compatible locking hardware become more important |
Are Fiberglass Doors Better Than Steel? Compare the Complete Door System
Before deciding that one material is better, compare five parts of the actual door being quoted.
1. Slab-Only or Complete Replacement?
A slab-only replacement reuses the existing frame. A prehung replacement normally includes a new slab, jambs and threshold assembled as a unit.
Reusing the frame may make sense when it is square, stable, dry and compatible with the new slab. A complete replacement is usually the stronger option when the frame is damaged, twisted, leaking or no longer sealing evenly.
A slab price and a complete prehung installation are not equivalent quotations.
2. Is the Energy Rating for the Exact Door?
A steel skin may feel colder to the touch in winter because metal conducts heat readily. That does not reveal how much heat the complete entrance loses.
Canadian windows, doors and skylights are tested for energy performance under CSA A440.2. When ratings are available, compare the certified U-factor and product description for the complete configuration, including its frame and glazing. A lower U-factor indicates less heat transfer.
Also check:
- how much glass is included;
- the glass construction and coatings;
- weatherstripping around the perimeter;
- the door sweep and threshold;
- whether the installed unit closes evenly against its seals.
A well-specified steel system can outperform a poorly configured fiberglass entrance. Compare the tested product, not the material adjective.
3. How Much of the Entrance Is Glass?
A solid door, half-glass door, full-glass door and entrance with two sidelights are not directly comparable.
Decorative glass can materially affect:
- the final price;
- energy performance;
- privacy;
- the amount of natural light;
- security around the lock area;
- the weight of the slab.
If the entrance is mostly glass, changing the skin from steel to fiberglass may be less important than improving the glass package and frame.
4. What Supports the Lock?
Steel is physically strong, but residential security is not determined by the centre of the slab alone. The deadbolt engages the strike, the strike connects to the jamb and the jamb must be secured to the wall framing.
Compare:
- frame material and condition;
- strike-plate construction and fasteners;
- deadbolt or multipoint-lock specification;
- hinges and hinge fasteners;
- glass location;
- the inactive side and centre joint of double doors.
A properly reinforced fiberglass system may be more secure than a steel slab installed in a weak frame. Security should be specified as a complete assembly.
5. What Weather and Heat Will the Door Face?
A door under a deep porch faces different conditions from a west-facing entrance exposed to afternoon sun, wind-driven rain and wet snow.
Before choosing the material and finish, check:
- the depth of the porch or overhang;
- direct rain and snow exposure;
- whether water or slush collects near the threshold;
- south- or west-facing sun;
- whether a dark finish is approved;
- whether a storm door is planned.
Some manufacturers restrict dark finishes or storm-door use in areas of intense sun because heat can become trapped between the doors. These conditions and warranty rules vary by product; they are not solved simply by choosing fiberglass instead of steel.
When Fiberglass Earns the Higher Price
Fiberglass is most likely to justify its premium when more than one of these conditions applies:
- You want a stained wood appearance. Oak- and mahogany-style fiberglass skins can create a closer wood effect than a smooth painted slab.
- The entrance is an important part of the front elevation. A main door may justify more design spending than a utility or basement entrance.
- You want to avoid ordinary dents and exposed-steel corrosion. Fiberglass does not rust and is less susceptible to the small dents that can mark smooth steel.
- You need finish flexibility on both sides. Fiberglass may be stained or painted differently inside and outside, subject to the selected finishing system.
- The project is already highly customised. On an eight-foot, double or sidelight entrance, the material difference may represent only part of the total system cost.
Fiberglass is not damage-proof. Severe impact can chip or crack the skin, and poor installation can still produce sticking, uneven gaps or water problems.
When Steel Is the Better Use of Budget
Steel should not be treated as the inferior option simply because standard configurations usually cost less.
It is often the more practical choice when:
- The opening is secondary. A side, back, basement or utility entrance may not need a premium stained woodgrain finish.
- The entrance is well sheltered. A generous porch reduces direct rain, snow and sun exposure.
- You want a smooth painted design. Steel works well for simple panels, contemporary grooves and coloured exteriors.
- Decorative glass is the main visual feature. Many steel-door projects use stained, wrought-iron or privacy glass as the centre of the design.
- The budget is better spent elsewhere. A stronger frame, better glass, improved locking hardware and careful installation may provide more value than changing the slab material.
A scratched steel finish should be repaired before exposed metal begins to corrode. The risk depends on coating quality, exposure and maintenance rather than the word “steel” alone.
When the Usual Recommendation Can Be Wrong
A covered front entrance may not need fiberglass
If the opening is sheltered and the homeowner wants a smooth painted finish, a well-specified steel system may provide everything the project needs at a lower cost.
A fiberglass door is not automatically more efficient
A large decorative insert or two sidelights can change the thermal result. Compare the rating of the exact configured entrance.
A premium slab will not repair a failing frame
Replacing only the slab may leave the homeowner with the same twisted jamb, leaking sill or uneven weatherstrip contact.
Fiberglass does not remove every heat-exposure risk
Dark finishes, direct afternoon sun and trapped heat behind a storm door can still affect the finish, operation or warranty of a fiberglass entrance.
Steel is not automatically the security winner
A strong slab cannot compensate for a weak strike, short fasteners, deteriorated jamb or poorly secured frame.
Is the Material Actually Causing the Problem?
When a door leaks, sticks or feels drafty, the visible slab material may not be the cause.
| Symptom | Inspect first | Why the material alone does not answer it |
|---|---|---|
| Light or a draft around the perimeter | Weatherstripping, strike adjustment and jamb alignment | The slab may not be contacting the seals evenly |
| Water at the bottom corners | Sweep, corner pads, sill, sealant and drainage | Water often enters at joints around the slab rather than through it |
| Door sticks or has uneven gaps | Hinges, long fasteners, frame alignment and sill level | Sagging or a twisted jamb can look like slab warping |
| Door will not latch consistently | Strike position, hinge movement and frame alignment | The lock and jamb may have moved relative to each other |
| Moisture between the panes | Insulated glass unit | The glass may have failed while the steel or fiberglass slab remains sound |
| Surface damage | Steel coating or fiberglass skin | This is one of the cases where the material itself may determine the repair approach |
Manufacturer troubleshooting guidance connects common drafts, water entry and operational problems to weatherstrip contact, sill sealing, hinge fastening and jamb alignment.
How to Compare Two Door Quotes
Before deciding that one fiberglass or steel option is cheaper, confirm that both quotations include the same system and work.
- Replacement scope: slab only or complete prehung unit?
- Dimensions: standard, eight-foot, double or custom?
- Frame: what material, reinforcement and exterior trim are included?
- Glass: is the size, design, privacy level and energy specification equivalent?
- Sill and seals: what threshold, sweep and weatherstripping are supplied?
- Hardware: standard deadbolt, reinforced strike or compatible multipoint lock?
- Finish: which sides are finished, by whom and under what warranty?
- Installation: are removal, disposal, fastening, insulation, sealant and trim included?
- Opening repairs: who handles damaged framing or threshold work?
- Performance: does the rating apply to the exact complete configuration?
Do not compare a basic steel slab with a complete custom fiberglass entrance and attribute the entire price difference to the material.
For some selected eight-foot door systems, manufacturers highly recommend multipoint locking hardware. Treat this as a product-specific specification to confirm, not a universal rule for every tall door.
Are Fiberglass Doors Better Than Steel?
Fiberglass is often the stronger choice for a prominent main entrance when woodgrain appearance, staining options and resistance to ordinary dents or rust justify the additional cost.
Steel is often the better value for a smooth painted, sheltered or secondary entrance.
For an accurate comparison, match the complete configuration: slab, frame, glass, sill, seals, hardware, finish, installation and warranty. A good steel system can be better than a poor fiberglass system, and an expensive slab cannot compensate for a weak frame or careless installation.
Frequently Asked Questions
Are fiberglass doors worth the extra cost?
Fiberglass is usually worth the additional cost when the door is a prominent main entrance, you want a stained oak or mahogany appearance, or resistance to everyday dents and steel-skin rust is important. For a sheltered side, back or basement entrance, a properly specified steel door may provide better value.
Which is better for Canadian winters: fiberglass or steel?
Neither material wins based on winter conditions alone. Fiberglass does not have a steel skin that can corrode if its finish is damaged, while a steel surface may feel colder to the touch. Actual winter performance depends on the complete door system, including the insulated core, glass, frame, threshold, weatherstripping and installation.
Can fiberglass exterior doors warp?
A properly selected and installed fiberglass door should remain stable, but fiberglass is not immune to every alignment or heat-related problem. Direct sun, unsuitable dark finishes, heat trapped behind a storm door, loose hinges, a twisted frame or an uneven sill can cause sticking or gaps that may look like slab warping.
Are steel doors more secure than fiberglass doors?
Not automatically. Steel is physically strong, but entrance security also depends on the frame, strike plate, fasteners, deadbolt or multipoint lock, hinges, glass and installation. A reinforced fiberglass door system can be more secure than a steel slab installed in a weak or damaged frame.
Should I choose steel or fiberglass for a basement or side door?
Steel is often the practical starting point for a basement, side or utility entrance because these doors usually need reliable function and a painted finish rather than a premium woodgrain appearance. Fiberglass may still be worthwhile when the entrance is highly exposed, heavily used or particularly vulnerable to dents and moisture.
Does decorative glass affect which door material is better?
Yes. A large glass insert, sidelights or a transom can influence the price, energy performance, privacy and security of the entrance more than the difference between the steel and fiberglass skins. Compare doors with equivalent glass packages before judging the materials.

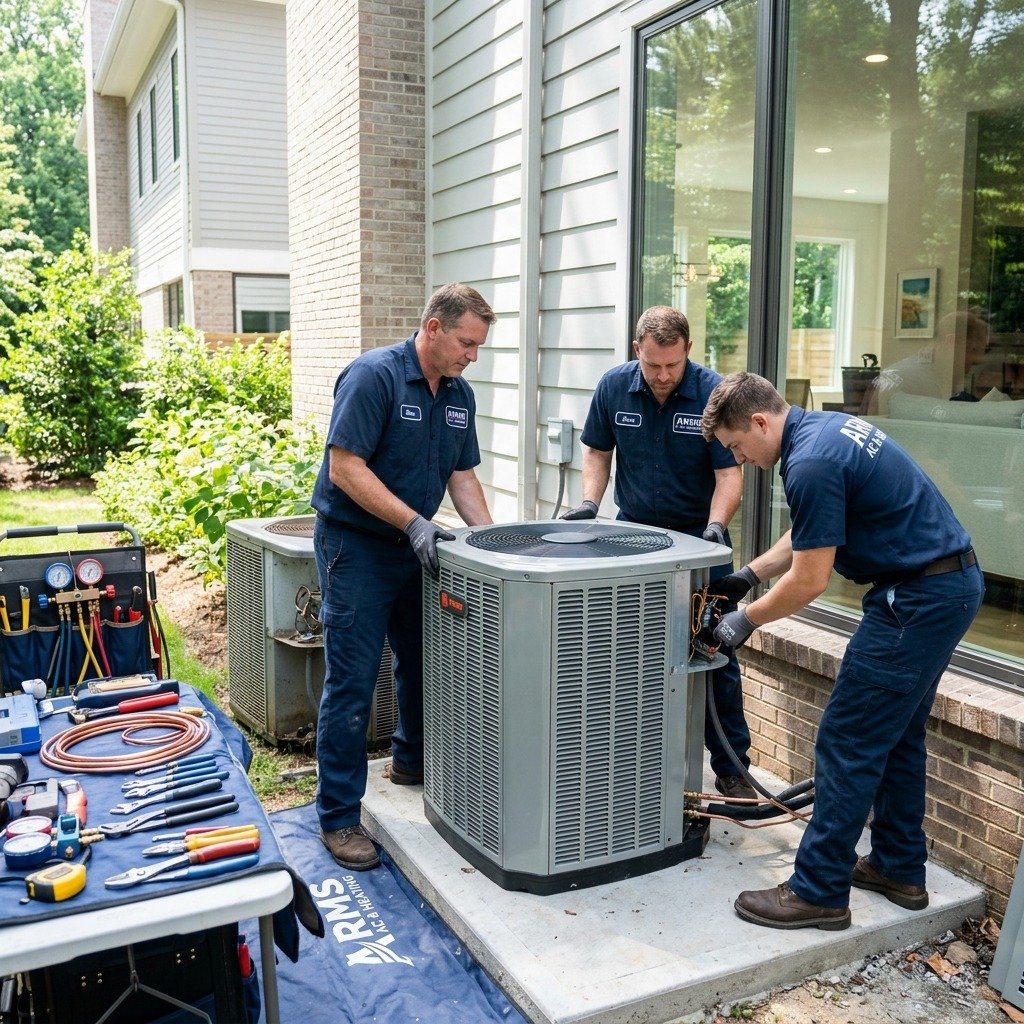
Summer heat is relentless. The last thing anyone needs is an air conditioner that sputters, struggles, and ultimately quits—leaving you stuck in a sweltering home waiting on yet another repair visit. At Arms AC and Heating, we’ve seen it happen countless times: homeowners pouring money into aging units, only to face the same breakdown a few months later.
The truth is, there comes a point when repairing your old system stops making financial sense. Knowing when that point arrives—and acting on it—can save you thousands of dollars and a whole lot of frustration.
Why Old AC Units Start Costing More Than They’re Worth
Air conditioners don’t fail all at once. They decline gradually, draining your wallet along the way. Repair costs creep up. Energy bills climb higher each summer. Comfort becomes inconsistent—too hot in one room, barely cool in another.
Most central AC units are designed to last 10 to 15 years. Once a system passes that mark, its efficiency drops significantly. Refrigerant leaks become more common. Compressors wear out. Parts get harder to source.
Here’s a simple rule of thumb: if the cost of a repair exceeds 50% of the cost of a new unit, replacement is almost always the smarter move. Continuing to patch an old system is like putting new tires on a car with a failing engine—it delays the inevitable while the expenses pile up.
Signs That It’s Time to Stop Repairing and Start Replacing
Not sure whether your system has hit its limit? Watch for these warning signs:
- Frequent breakdowns: If you’re calling for service more than once a season, your unit is telling you something.
- Rising energy bills: An inefficient system works harder to produce the same cooling, driving up electricity costs month after month.
- Uneven cooling: Hot spots and inconsistent temperatures throughout the home are a classic sign of a struggling system.
- Unusual sounds or odors: Grinding, banging, or musty smells often point to internal components that are failing.
- Refrigerant issues: Older units may use R-22 refrigerant, which is now phased out and expensive to source.
Any one of these issues warrants a professional evaluation. Several of them together? It’s time to have a serious conversation about replacement.
The Real Benefits of Installing a New AC System
A new air conditioning system delivers more than just cool air. Modern units are significantly more energy-efficient than systems manufactured even five years ago. Higher SEER (Seasonal Energy Efficiency Ratio) ratings translate directly into lower monthly utility bills—often enough to offset the cost of installation over time.
Beyond savings, there’s the comfort factor. New systems cool more evenly, operate more quietly, and integrate with smart thermostats to give you precise control over your home’s temperature. Many newer models also offer improved air filtration, reducing allergens, dust, and humidity levels indoors.
And then there’s the peace of mind. A new unit comes with a manufacturer’s warranty, meaning you’re covered if something goes wrong—without the dreaded service call bill.
Why Arms AC and Heating Is the Right Team for the Job
At Arms AC and Heating, AC replacement is one of our core specialties. Our technicians don’t just swap out units—they assess your home’s layout, square footage, insulation, and ductwork to recommend the right system for your specific needs. The wrong size unit, even a brand-new one, will underperform and waste energy.
We work with leading manufacturers to offer systems that balance performance, efficiency, and long-term reliability. From the initial evaluation to final installation and testing, every step is handled with precision and professionalism.
Our team understands that replacing your AC is a significant investment. That’s why we walk every homeowner through their options clearly, without pressure or confusing jargon.
What to Expect From the AC Replacement Process
Replacing an AC unit with Arms AC and Heating is straightforward and efficient. Here’s what the process typically looks like:
1. In-Home Assessment
A certified technician visits your home to evaluate your current system, measure your space, and identify any ductwork concerns that may need to be addressed.
2. System Recommendation
Based on the assessment, you’ll receive a clear recommendation for the right unit—sized appropriately and matched to your efficiency goals and budget.
3. Scheduled Installation
Our installation team works efficiently to minimize disruption to your day. Most residential replacements are completed within a single day.
4. System Testing and Walkthrough
Once installed, the system is fully tested to ensure it’s running optimally. Our technician will walk you through the new unit’s features and answer any questions you have.
Make the Switch Before the Next Heat Wave Hits
AC Replacement done right can dramatically lower your energy bills, eliminate constant repair costs, and restore total comfort to your home—without the stress of wondering when the next breakdown will happen.
Arms AC and Heating is ready to help you make that transition smoothly. Whether your system just gave out or you’ve been nursing it along for a few too many summers, now is the right time to invest in reliable, efficient cooling.
Don’t wait for a complete breakdown in the middle of a heat wave. Contact Arms AC and Heating today to schedule your in-home evaluation and take the first step toward a cooler, more comfortable home.

How to Keep Characters Consistent in AI Feed Ad Generators

The Questions Worth Asking Before Dental Implant Newcastle Treatment

What to Expect Before, During, and After Dental Implants Newcastle

Why Complete Temperature Services Is the HVAC Contractor Your Home Deserves

Clean425: Restoring Curb Appeal One Property at a Time

Who Is Indiana Urban? Inside the Life of Karl Urban’s Son and Rising Actor

Jennifer Seyfried: All About Amanda Seyfried’s Sister, Her Life and Career

Who Is Zachary Hudson? Inside the Private Life of Cindy Williams’ Son

Cynthia Womack Biography: The Life, Career, and Legacy of Connie Britton’s Twin Sister

Who Is Stephen G. Walker? All About PinkPantheress’ Father and His Academic Career
Who Is Indiana Urban? Inside the Life of Karl Urban’s Son and Rising Actor
Jennifer Seyfried: All About Amanda Seyfried’s Sister, Her Life and Career
Who Is Zachary Hudson? Inside the Private Life of Cindy Williams’ Son
Cynthia Womack Biography: The Life, Career, and Legacy of Connie Britton’s Twin Sister
Who Is Stephen G. Walker? All About PinkPantheress’ Father and His Academic Career
-
Biography5 months ago
Who Is Indiana Urban? Inside the Life of Karl Urban’s Son and Rising Actor
-
Biography4 months ago
Jennifer Seyfried: All About Amanda Seyfried’s Sister, Her Life and Career
-
Biography4 months ago
Who Is Zachary Hudson? Inside the Private Life of Cindy Williams’ Son
-
Biography5 months ago
Cynthia Womack Biography: The Life, Career, and Legacy of Connie Britton’s Twin Sister
-
 Biography3 months ago
Who Is Stephen G. Walker? All About PinkPantheress’ Father and His Academic Career
-
 Biography5 months ago
Who Was Gretchen Knauff? The Private Life of Jennifer Coolidge’s Mother
-
 Biography4 months ago
Who is Lynn Levesque? Everything to Know About Triple H’s Sister
-
 Biography4 months ago
Lynn Payne: Inside the Life and Love Story of Randy Savage’s Wife