
News
Panel Upgrades: Is Your Home Ready for What’s Next?

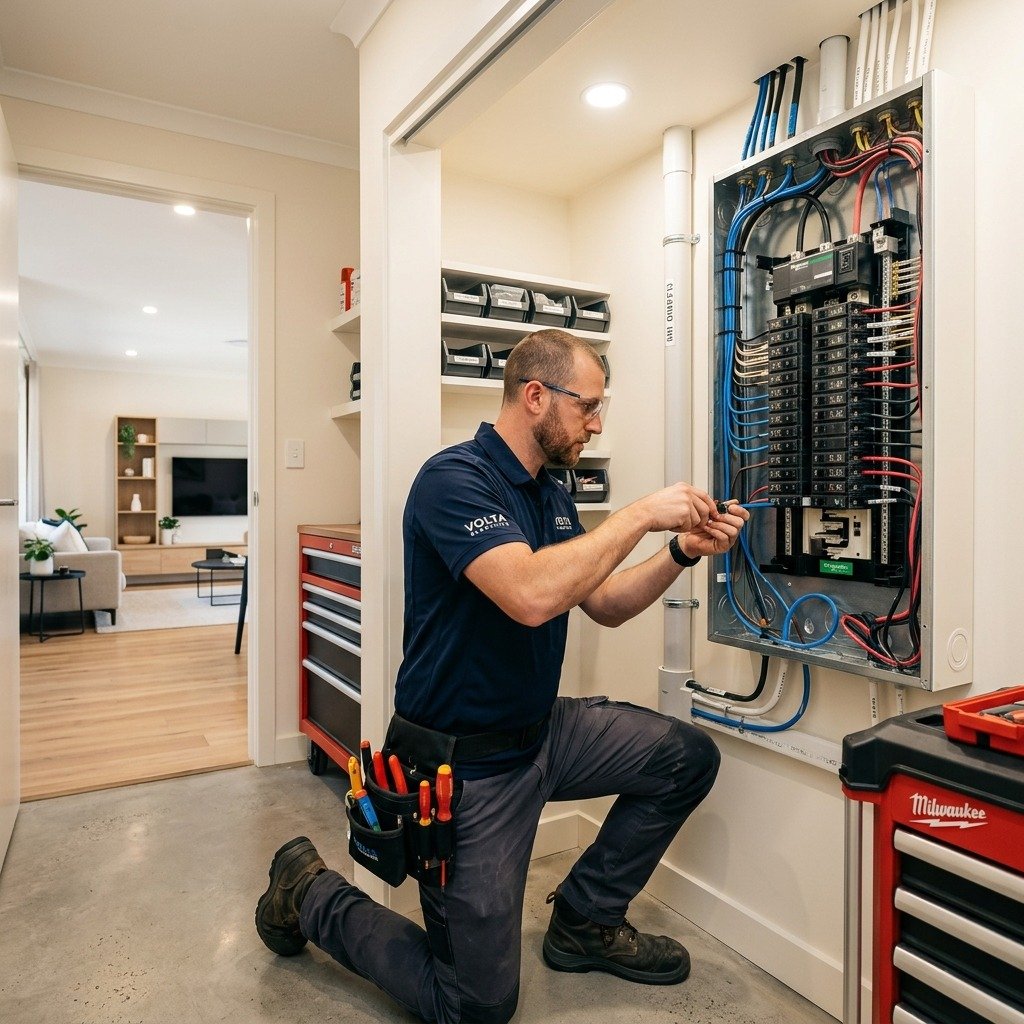
Your electrical panel is the backbone of your home. Every light switch, kitchen appliance, EV charger, and home office setup depends on it. Yet most homeowners never think about their panel—until something goes wrong.
That’s the problem. Electrical panels are one of those “out of sight, out of mind” systems that quietly reach their limits while the rest of the home evolves around them. Outdated panels weren’t built for smart TVs, electric vehicle chargers, or high-powered HVAC systems. And when you push an aging panel past its limits, the consequences can range from tripped breakers and flickering lights to far more serious safety hazards.
The good news? A panel upgrade isn’t just a fix—it’s a meaningful investment in your home’s future. Collins Electric helps homeowners and businesses get ahead of the problem, not just react to it.
What Does a Panel Upgrade Actually Involve?
A panel upgrade—sometimes called an electrical service upgrade—replaces your existing breaker box with a new, higher-capacity unit. This typically means moving from an older 100-amp panel to a modern 200-amp or 400-amp system, depending on your property’s needs.
The process involves:
- Removing the old panel and safely disconnecting existing circuits
- Installing a new, code-compliant breaker box with expanded capacity
- Reconnecting and labeling circuits for safety and organization
- Coordinating with your utility provider for the service connection
- Passing a final inspection to confirm the work meets local electrical codes
It’s a structured process—and when handled by licensed electricians like the team at Collins Electric, it’s completed efficiently with minimal disruption to your daily routine.
Signs Your Electrical Panel Needs an Upgrade
Not every panel issue announces itself dramatically. Some warning signs are subtle. Others are hard to ignore. Here’s what to watch for:
Frequent Breaker Trips
If you’re resetting breakers on a regular basis, your panel is telling you something. A breaker that trips once is doing its job. A breaker that trips repeatedly under normal load is a sign the circuit—or the entire panel—is struggling to keep up.
Flickering or Dimming Lights
Lights that dim when you run the microwave or start the washing machine suggest your electrical system is being stretched beyond its capacity. This is especially common in older homes that were never wired for today’s power demands.
Your Panel Is 25+ Years Old
Panels from the 1980s and 1990s weren’t engineered for modern electrical loads. Some older panels—particularly brands like Federal Pacific and Zinsco—have well-documented safety issues and are considered fire hazards by many electricians and insurance providers.
You’re Adding Major Appliances or an EV Charger
Electric vehicles require Level 2 charging stations, which pull significant power. The same goes for hot tubs, whole-home generators, or large HVAC upgrades. Before any of these installations, it’s worth having your panel assessed.
Your Home Uses Fuses Instead of Breakers
Fuse boxes are a clear indicator of an outdated system. Beyond the inconvenience of replacing fuses, they simply can’t handle the electrical demands of a modern household safely.
Why Panel Upgrades Deliver Real Long-Term Value
It’s easy to view a panel upgrade as a cost. Look at it differently, and the picture changes quickly.
Safety comes first. Electrical fires account for tens of thousands of home fires annually in the United States, according to the U.S. Fire Administration. Many are traced back to outdated or overloaded electrical systems. A modern panel, installed correctly, eliminates a significant source of risk.
Home value increases. Updated electrical infrastructure is a selling point. Buyers—and their inspectors—take note of a modern, properly sized panel. Homes with outdated panels often face renegotiated offers or requirements to upgrade before closing.
Energy efficiency improves. Newer panels work more efficiently and support smart home technology, whole-home surge protection, and solar energy systems. The upgrade opens doors to a range of modern electrical solutions.
Insurance becomes easier. Some insurers charge higher premiums—or decline to cover homes—with older panels, especially those from manufacturers flagged for safety concerns. An upgrade can directly affect your coverage options.
What Sets a Professional Panel Upgrade Apart
Panel upgrades aren’t a DIY project. Electrical work at this scale requires permits, coordination with the utility company, and a licensed electrician who understands local code requirements. Cutting corners here creates liability and safety risks that outlast the original problem.
Panel Upgrades performed by experienced, licensed electricians give homeowners the peace of mind that comes from knowing the work is done right, built to code, and backed by professional accountability—so your home’s electrical system can support everything you’re running today and everything you plan to add tomorrow.
Collins Electric brings that level of expertise to every job. The team manages the full process—from the initial assessment and permit filing to the final inspection—so homeowners don’t have to navigate it alone.
How Much Does a Panel Upgrade Cost?
Costs vary based on several factors: the size of the new panel, the complexity of the existing wiring, local permit fees, and whether any additional work is required (such as updating grounding systems or replacing outdated wiring near the panel).
A straightforward residential upgrade from 100 amps to 200 amps typically falls in the range of $1,500 to $3,500, including labor and permits. Larger upgrades for high-demand homes or commercial properties run higher.
The better question isn’t “how much does it cost?” but rather “what does it cost to wait?” Delayed upgrades often lead to more extensive repairs, higher insurance costs, or emergency service calls at inconvenient times.
Making the Right Call Before Problems Escalate
Electrical panels don’t fail on a schedule. They fail when you least expect it—during a heat wave when the AC is running, during the holidays when every outlet is in use, or the morning you try to charge your new EV for the first time.
The homeowners who avoid those scenarios are the ones who get ahead of the problem. A quick assessment from a qualified electrician can tell you exactly where your panel stands—and whether an upgrade belongs on your near-term list.
Collins Electric makes that process straightforward. From the first conversation to the completed upgrade, the focus is on giving your home the electrical capacity it needs to run safely, efficiently, and reliably for years to come.
Frequently Asked Questions About Panel Upgrades
How long does a panel upgrade take?
Most residential panel upgrades are completed in a single day. More complex jobs—particularly those involving older wiring or larger commercial systems—may take longer. Collins Electric provides a clear timeline before work begins.
Will my power be off during the upgrade?
Yes, the power to your home will need to be shut off during the installation. In most cases, the outage lasts between 4 and 8 hours. Collins Electric coordinates with your utility provider to schedule this as conveniently as possible.
Do I need a permit for a panel upgrade?
Yes. Electrical panel upgrades require a permit in virtually every municipality. A licensed electrician handles the permit process and ensures the completed work passes inspection.
Can a panel upgrade support solar panels or EV chargers?
Absolutely. Upgrading to a 200-amp or 400-amp panel is often a prerequisite for installing solar systems, battery storage, and Level 2 EV chargers. It’s worth planning these additions together to minimize future costs.
How do I know if my current panel is a safety risk?
Signs include frequent tripping, visible rust or burn marks, a warm panel box, or a panel manufactured by brands with known safety issues (Federal Pacific, Zinsco, or Pushmatic). When in doubt, schedule a professional inspection.


Opening your monthly electric bill should not feel like an unsettling financial shock. Yet for millions of homeowners, utility expenses quietly creep higher every season, even when daily routines remain unchanged. High electricity bills are rarely caused by a single glaring issue; instead, they are usually the cumulative result of small power drains scattered across your living space. By identifying where your energy actually goes, you can make targeted adjustments that reduce expenses without sacrificing family comfort. Here are 10 possible reasons why your electric bill is too high.
1. Aging or Inefficient Household Appliances
Major household units like refrigerators, clothes dryers, and dishwashers consume significant power. As appliances age, internal mechanical parts wear down, motors strain, and rubber door seals degrade, forcing them to draw far more electricity to perform routine tasks. Replacing decade-old units with ENERGY STAR® certified models can cut equipment energy consumption substantially over time.
2. Overworked Heating and Cooling Systems
Heating and cooling account for nearly half of an average household’s total energy usage. When HVAC units suffer from worn parts or neglected maintenance, they work harder and run longer to keep temperatures comfortable. Constantly fluctuating settings or maintaining extreme thermostat temperatures further inflate monthly bills.
3. Phantom Power and Vampire Loads
Many modern electronics draw electricity even when turned off—a phenomenon known as “vampire draw” or phantom load. Gaming consoles, smart TVs, microwave displays, and device chargers left plugged in around the clock can account for up to 10% of total residential energy usage. Connecting electronics to smart power strips completely cuts power when devices become idle.
4. Poor Insulation and Drafty Seals
When gaps exist around door frames, window seals, and attics, conditioned indoor air constantly escapes while outside air seeps inside. This forces your heating and cooling equipment into endless operational cycles to keep up. Sealing drafts with caulk and upgrading insulation creates a tight thermal barrier that stabilizes indoor temperatures naturally.
5. Outdated Incandescent Lighting
Traditional incandescent lightbulbs convert the vast majority of their electrical energy into heat rather than illumination. Keeping outdated bulbs running throughout your home silently raises utility expenses. Switching entirely to LED lighting reduces power consumption for lighting by up to 80% while lasting up to 25 times longer.
6. High Water Heater Temperatures
Water heating represents roughly 14% to 18% of standard utility bills, making it one of the largest power expenses in most homes. Many factory units come set to 140°F, wasting standby power to maintain unnecessarily high heat levels. Adjusting the thermostat down to 120°F provides ample hot water while curbing standby heat loss.
7. Restricted HVAC Air Filters and Ductwork
A neglected heating and cooling system suffers from restricted airflow when air filters accumulate dust and debris. Clogged filters force blower motors to strain, drawing excess power. Furthermore, leaky ductwork allows treated air to escape into unconditioned spaces like attics or crawlspaces. Replacing filters every 1 to 3 months helps maintain system performance.
8. Running High-Power Appliances During Peak Hours
Utility companies frequently charge variable rates depending on the time of day, with peak hours carrying significantly higher prices. Running power-heavy appliances like dishwashers, clothes dryers, or electric vehicle chargers during late afternoon or early evening peak demand windows noticeably increases billing totals.
9. Inefficient Hot-Water Laundry Habits
Roughly 75% to 90% of the energy consumed by a washing machine goes directly toward heating water. Running warm or hot water wash cycles for routine laundry unnecessarily inflates utility expenses. Switching to cold-water wash cycles with cold-water detergents yields thoroughly clean clothes while maximizing electrical efficiency per load.
10. Complete Dependence on Grid Infrastructure
Relying entirely on traditional utility power leaves homeowners vulnerable to seasonal rate adjustments and rising grid costs. For property owners seeking a permanent way to offset peak utility rates, investing in clean energy options like solar panels in Utah offers a reliable path toward long-term energy independence.
Taking Control of Your Energy Costs
Lowering a high electric bill does not require a complete lifestyle sacrifice or massive immediate expenses. By pairing low-cost daily habits—such as washing laundry in cold water and eliminating phantom power loads—with strategic home maintenance, you can permanently trim your monthly utility expenses. Small improvements made today compound into significant financial savings month after month.

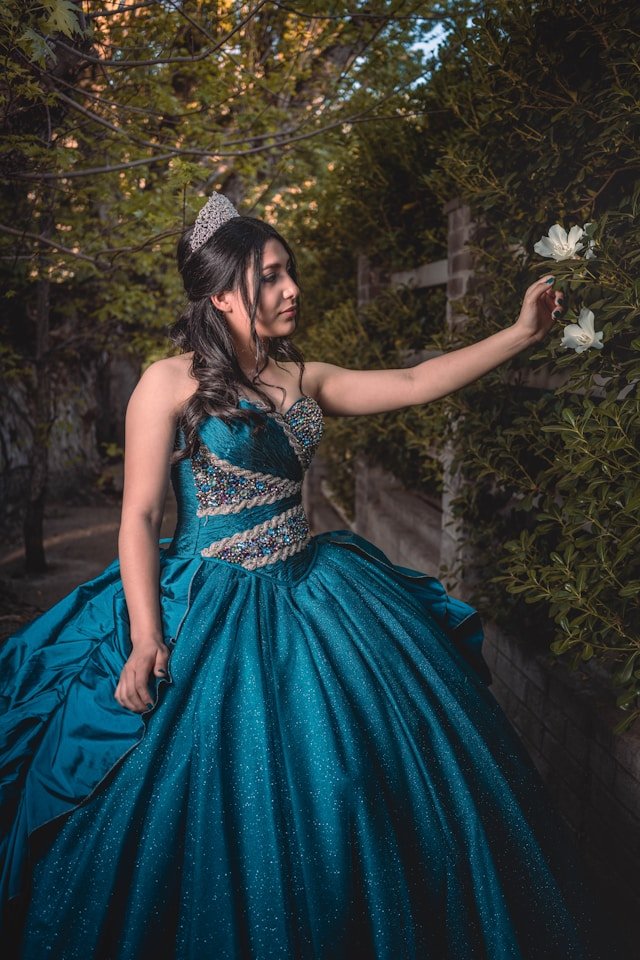
Choosing a formal gown for an Idaho celebration is about more than finding a beautiful photograph online. The right dress should suit the setting, season, schedule, movement, and the person wearing it. Whether you are beginning with a clear vision or comparing several quinceanera dresses Idaho shoppers can find, a thoughtful process makes the appointment feel calmer and more productive.
Start by discussing the celebration as a whole with the wearer and family members involved in the planning. Then consider practical details such as alterations, travel, shoes, and weather before falling in love with one particular style. This guide walks through those decisions in an order that keeps both the dream and the logistics in view.
Start with the celebration details
A gown feels most successful when it belongs naturally in the celebration around it. The venue, ceremony length, reception plans, and family traditions can all shape the best choice. Before shopping, gather the details that will affect the dress rather than relying on appearance alone.
Match the gown to the venue and formality
A ballroom, church, community hall, outdoor garden, or private home each creates a different backdrop. A full skirt and long train may suit a highly formal ballroom, while a simpler silhouette can feel more at ease in a smaller or outdoor setting. Consider the room’s scale, flooring, stairs, and dress expectations before choosing the most elaborate option.
Consider Idaho’s seasonal weather
Idaho celebrations may involve cold evenings, dry summer heat, or changing temperatures between indoor and outdoor spaces. A gown that works for the season may need a wrap, sleeves, breathable lining, or a lighter skirt construction. Weather should not dictate the whole look, but it should influence comfort and the pieces you plan to bring.
Plan for ceremony, reception, and travel
Think through the complete route from getting ready to the final dance. Long drives, photographs outside, stairs, crowded tables, and a change of footwear can all affect the practical design. If the gown will travel between locations, ask how it should be folded, transported, steamed, and stored.
Identify cultural and personal style preferences
A quinceañera gown often carries meaning for the wearer and family, so the conversation should include preferred colors, coverage, symbolic details, and traditions. Some people want a dramatic entrance; others prefer a refined gown that feels closer to their everyday personality. Personal comfort matters because confidence tends to show more clearly than any single trend.
Explore quinceanera dresses in Idaho
Shopping locally can make it easier to see construction, compare colors, and discuss alterations in person. Idaho shoppers may also need to account for travel between cities or for ordering timelines. Make a short list of appointments and questions before visiting stores so the search remains focused.
Compare shopping options in Boise, Idaho Falls, and Caldwell
Boise, Idaho Falls, and Caldwell each offer different starting points depending on where the family lives and how far they are willing to travel. Compare appointment availability, selection, parking, and the time required for follow-up fittings. Downtown Bridal & Dress Shop is one store shoppers can consider when exploring quinceanera dresses in Idaho, while a broader search can help clarify the preferred style and price range.
Evaluate local boutiques versus online retailers
A local boutique offers the advantage of trying on gowns and seeing how they move before ordering. Online shopping may provide a wider visual search, but measurements, return rules, fabric color, and shipping dates require closer attention. For gowns for women Idaho families are evaluating, the best route is the one that provides enough time to verify fit and make corrections.
Check sizing, inventory, and appointment policies
Sizing can vary considerably between designers, so do not assume a usual clothing size will transfer directly to a formal gown. Ask whether samples are available in useful sizes, how many people may attend, and whether appointments are required. Confirm how long special orders take and whether a gown in stock can be held while the decision is made.
Ask about customization and special orders
Some gowns can be ordered with changes to color, trim, straps, or other details, while others are available only as shown. Ask which adjustments are possible, how they affect cost, and whether a customized order can be returned. Downtown Bridal & Dress Shop can be included on the appointment list for families comparing available dress options, but the exact gown, timing, and policies should be confirmed directly before committing.
Choose a silhouette that supports comfort and movement
Silhouette is the framework of the gown, influencing how it looks in photographs and how it feels across a long day. Trying on more than one shape often reveals preferences that are difficult to predict from a hanger. Movement, support, and ease of sitting deserve as much attention as the first impression in the mirror.
Understand ball gown, A-line, mermaid, and fit-and-flare styles
A ball gown has a fitted upper portion and a notably full skirt, creating a traditional, dramatic effect. An A-line gradually widens from the waist and often offers easy movement. Mermaid and fit-and-flare styles follow the body more closely before widening lower on the skirt, which can create a sleek outline but may require more testing when walking or dancing.
Select a neckline and back design for the desired coverage
Necklines and back details affect both visual balance and security. Sweetheart, scoop, halter, bateau, and higher necklines can offer different levels of coverage, while open, illusion, or lace backs change the gown’s overall mood. Choose a design that feels appropriate for the ceremony and stays comfortable when the wearer raises her arms or sits down.
Test how the dress moves when walking, sitting, and dancing
A fitting should include more than standing in front of a mirror. Walk at a natural pace, sit in a chair, turn, climb a step, and practice a few dance movements. Notice whether the skirt catches underfoot, the bodice shifts, or the train needs a bustle for the reception.
Balance dramatic details with all-day wearability
A train, layered skirt, corset-style bodice, or extensive embellishment can create a memorable entrance. Those details may also add weight or make transportation more difficult. Try to preserve the features that express the wearer’s personality while removing anything that will make several hours of celebration unnecessarily tiring.
Select fabrics, colors, and embellishments
Fabric changes the drape, weight, texture, and way a gown responds to light. Color can look different in a store, at the venue, and in outdoor photographs. Bring reference images and, if possible, view the dress under more than one type of lighting before making a final decision.
Choose fabrics suited to the season and venue
Tulle can create airy volume, satin usually gives a smooth and polished surface, and lace adds texture and visual softness. Heavier layers may feel appropriate for a formal winter setting but less comfortable during a warm reception. Consider ventilation, lining, the amount of skirt volume, and whether the venue has climate control.
Coordinate the gown with the celebration’s color palette
The gown does not need to match every decoration exactly. Instead, look for a relationship between the dress, flowers, attendants’ clothing, table details, and venue colors. A chosen accent can appear in embroidery, a sash, shoes, jewelry, or another small detail without making the entire look feel overly coordinated.
Compare beading, embroidery, lace, and sequin details
Beading can catch light and add structure, while embroidery offers a more stitched, dimensional effect. Lace may create delicate patterning, and sequins bring noticeable sparkle as the wearer moves. Run a hand gently over the inside and outside of the gown to check for rough edges, loose details, or areas that could rub during the event.
Consider how fabric photographs under indoor and outdoor lighting
A gown that looks soft in a fitting room may appear brighter under flash or sunlight. Ask to see photographs from several angles and check how shine, sparkle, and illusion panels appear on camera. The goal is not to eliminate texture, but to choose details that remain attractive in both close portraits and wider celebration photographs.
Build a realistic gown budget
The gown price is only one part of the formalwear budget. Alterations, pressing, undergarments, accessories, and transportation can change the final total. Set a comfortable range before appointments, then leave room for necessary finishing work rather than spending the entire amount on the dress itself.
Account for the dress, alterations, and steaming
Ask whether the quoted price includes any adjustments or whether alterations are arranged separately. Hemming, reshaping the bodice, changing straps, and adding a bustle may each affect the total. Steaming or pressing should also be planned near the event, especially if the gown has traveled or been stored for several weeks.
Include shoes, accessories, and undergarments
Shoes influence the hem, posture, and comfort, so they should be selected before the final fitting. Jewelry, hair pieces, a veil or overskirt, shapewear, and supportive undergarments can also affect how the gown sits. Bring the intended foundation pieces to fittings whenever possible.
Compare quality, construction, and long-term value
Look at seams, lining, closures, boning, skirt layers, and how securely embellishments are attached. A lower price is not necessarily better value if the gown requires extensive repair or cannot be worn comfortably. A well-made dress may also be easier to alter and preserve after the celebration.
Ask about deposits, payment plans, returns, and cancellations
Before placing an order, request the policies in writing. Clarify the deposit amount, payment dates, cancellation terms, return restrictions, and what happens if delivery is delayed. These details are especially important for special-order gowns because they may not be treated like standard in-stock merchandise.
Get the right fit through professional alterations
Even a gown that looks nearly perfect on the hanger usually needs some adjustment. Formal dresses are designed around standard measurements, while each wearer has a distinct posture and proportion. A skilled alterations professional can preserve the intended shape while making the gown feel secure and natural.
Take accurate measurements before ordering
Measurements should be taken with the recommended undergarments and without pulling the tape tightly. Record the bust, waist, hips, hollow-to-hem, and any other measurements requested by the store or designer. If the wearer is still growing, discuss that fact before choosing a size or placing an order.
Schedule fittings around growth and event deadlines
Do not wait until the week of the celebration to arrange the first fitting. Build a schedule that allows time for the gown to arrive, initial alterations, a second check, and final steaming. The final appointment should be close enough to the event to reflect the current fit but early enough to correct an unexpected issue.
Adjust the hem, bodice, straps, and bustle
The hem should work with the selected shoes and the way the wearer walks. A bodice may need to be taken in or supported, while straps can require changes for proper coverage. If there is a train, practice the bustle so the wearer and one trusted helper know how it fastens before the reception begins.
Confirm comfort and security during the final fitting
At the last fitting, repeat the movements used during shopping. Sit, walk, raise the arms, turn, and dance briefly while checking for pinching, slipping, exposed closures, or loose embellishments. The gown should feel secure without restricting breathing or making normal movement feel like a performance.
Complete the formal look with practical styling choices
Styling works best when it supports the gown rather than competing with it. Shoes, hair, makeup, jewelry, and outer layers should be considered together, especially when the celebration includes more than one location. Small practical choices can protect comfort without taking away from the formal effect.
Coordinate shoes and accessories with the gown
Choose shoes that provide the planned height and enough stability for standing and dancing. Accessories can repeat a metal finish, echo a color, or balance a heavily detailed neckline. Avoid adding sparkle everywhere; one or two deliberate accents often look more polished than a collection of unrelated pieces.
Choose a hairstyle and makeup plan that complements the neckline
An updo can highlight a high neckline or detailed back, while softer hair may balance a structured bodice. Makeup should be tested in the lighting expected at the venue and should remain comfortable for several hours. A trial also gives the wearer time to identify sensitivities or changes before the event.
Prepare for Idaho venues with wraps or layering pieces
A wrap, bolero, shawl, or tailored jacket can provide warmth during outdoor photographs and travel between locations. Select a layer that works with the neckline and does not catch on beading or flatten the skirt. Keep it accessible rather than packed away, since temperatures can change quickly after sunset.
Create a fitting and event-day checklist
A short checklist reduces last-minute searching and helps the family divide responsibilities. Include the gown, shoes, undergarments, jewelry, emergency sewing supplies, garment bag, steamer plan, and bustle instructions. Downtown Bridal & Dress Shop may be among the stores a family consults during the dress search; regardless of where the gown is purchased, retain order details and fitting notes in one place.
Conclusion
The perfect formal gown is the one that reflects the celebration while allowing its wearer to move, breathe, and enjoy the day. By considering the venue, Idaho weather, silhouette, fabric, budget, alterations, and styling as connected decisions, families can shop with greater confidence. A beautiful gown matters, but feeling fully present in it is what makes the look memorable.
Frequently Asked Questions
When should someone begin shopping for a quinceañera gown?
Beginning several months before the celebration gives time for browsing, ordering, alterations, and unexpected delays. The ideal schedule depends on whether the gown is in stock or made to order.
How many dresses should someone try on before deciding?
There is no required number, but trying several silhouettes can reveal what feels best. Compare comfort, movement, coverage, and photographs rather than choosing only by the first mirror impression.
What should be brought to a gown appointment?
Bring supportive undergarments, shoes with the expected heel height, inspiration images, and the people whose opinions matter most. A phone can also help record notes and photographs when the store permits it.
How can a formal gown stay comfortable during a long reception?
Choose secure support, test sitting and dancing, select manageable weight, and plan practical shoes. A bustle and a light wrap can also make the transition from ceremony to reception easier.
Do quinceañera gowns usually need alterations?
Most formal gowns benefit from at least some adjustments because standard sizing cannot account for every body proportion. Common changes include the hem, bodice, straps, and bustle.
What colors work well for an Idaho celebration?
The best color depends on the venue, season, lighting, and personal preference. Compare fabric swatches or photographs in both indoor and outdoor light before deciding.
How should a gown be transported on the event day?
Use a breathable garment bag, keep the gown hanging when possible, and avoid leaving it in a hot vehicle for long periods. Ask the alterations professional or retailer for fabric-specific care and steaming guidance.
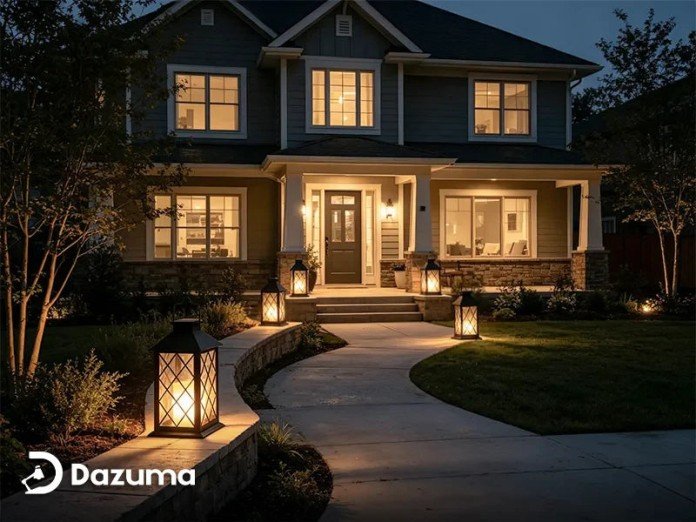
The exterior of a home should remain practical and welcoming after daylight fades. Without suitable lighting, steps become difficult to see, entrances feel less inviting, and architectural features disappear into the darkness. A few carefully selected wall lights can improve visibility while giving the building a more polished appearance.
Outdoor wall lighting is available in many forms, including traditional lanterns, compact downlights, modern up-and-down fixtures, linear sconces, motion-activated lights, and solar-powered designs. Choosing between them involves more than finding a fixture that looks attractive. Homeowners should also consider its purpose, position, brightness, weather resistance, scale, and relationship with the architecture.
Begin with the Purpose of Each Light
Before comparing finishes and shapes, decide what each fixture needs to accomplish. A light beside the front door may need to illuminate locks, house numbers, parcels, and visitors’ faces. A fixture near a side passage should make obstacles easier to see, while patio lighting may focus more on comfort and atmosphere.
Walk around the property after dark and identify areas where visibility is poor. Pay attention to steps, gates, doorways, garage entrances, narrow paths, and changes in ground level. These practical locations should usually be addressed before purely decorative areas.
Next, note the architectural features that deserve attention. Textured brick, natural stone, timber cladding, columns, and carefully designed entrances can all benefit from controlled illumination. When one fixture can support both visibility and architectural emphasis, the lighting plan becomes simpler and more effective.
Match the Fixture Style to the Architecture
A wall light should feel connected to the building rather than attached as an afterthought. Traditional lanterns suit cottages, period properties, and homes with classic doors or decorative masonry. Simple rectangular fixtures complement contemporary exteriors, while industrial-style lights can work well with brick, metal, and converted spaces.
Dazuma’s collection of Outdoor Wall Lighting shows how varied the category has become, with lantern-inspired fixtures, minimalist LED forms, linear sconces, solar options, and up-and-down designs. This variety makes it possible to choose a light that supports the character of the property instead of competing with it.
The fixture does not have to match every exterior detail exactly. Repeating one element—such as a black finish, warm metal tone, rectangular shape, or type of glass—is often enough to create a consistent visual relationship.
Choose the Correct Size
Scale is one of the most common sources of disappointment. A small wall light may look insignificant beside a wide entrance or large garage door. An oversized fixture can overwhelm a narrow doorway and shine into nearby windows.
Consider the dimensions of the wall, door, and surrounding architectural features. A fixture beside a single entrance door should normally remain clearly smaller than the door itself, while a large double entrance may support more substantial lights. Where two matching fixtures are installed on either side of a doorway, each can be slightly smaller because the pair creates a stronger combined presence.
Check the fixture’s projection from the wall as well as its height and width. A deep lantern may interfere with a narrow passage, door swing, downpipe, or garden gate even when its front-facing dimensions appear suitable.
Position Lights at a Comfortable Height
Outdoor wall lights should illuminate useful areas without shining directly into people’s eyes. Fixtures installed beside an entrance are commonly positioned around eye level or slightly above it, but the ideal height depends on the fixture’s proportions, beam direction, door design, and ceiling height.
Ask another person to hold a cardboard template against the wall before drilling. View it from the pavement, driveway, and doorway to judge whether the size and position feel balanced. This simple test can reveal problems that are difficult to recognise from measurements alone.
For up-and-down lights, make sure there is enough clear wall above and below the fixture for the beams to develop. Rooflines, signs, plants, window frames, and other obstructions can interrupt the intended effect.
Control Light Direction and Glare
Brighter lighting is not always better. A powerful unshielded light can make it harder to see by creating glare and deep shadows. The goal is to place light where it is needed while keeping the source as comfortable as possible.
Downward-facing fixtures work well above steps, pathways, and doors because they direct illumination towards the ground. Up-and-down lights produce decorative beams on the wall and can emphasise vertical architecture. Lanterns with diffused or frosted glass provide a softer general glow, while clear glass reveals the bulb and creates a more traditional appearance.
Check the beam from inside the house as well. A badly positioned fixture may shine through bedroom or living-room windows. Adjusting the height, selecting a lower lumen output, or choosing a more controlled beam can prevent unwanted indoor glare.
Select an Appropriate Colour Temperature
Colour temperature describes whether white light appears warm, neutral, or cool. Warm white light generally complements brick, timber, stone, and traditional architecture. It creates a relaxed atmosphere around front entrances, terraces, and garden seating areas.
Neutral white can provide clearer visibility around garages, side passages, and modern façades. Very cool light may appear harsh in residential settings, especially when neighbouring fixtures use a warmer tone.
Consistency matters. Wall lights visible together should usually have the same or closely related colour temperatures. A warm lantern beside a cold blue-white garage light can make the exterior appear disconnected, even when the fixtures are attractive individually.
Look Beyond Wattage When Comparing Brightness
Modern LED fixtures use much less energy than older bulbs, so wattage is no longer the clearest measure of brightness. Compare lumen output instead. A front entrance may need enough illumination for identification and access, while a patio may benefit from gentler light that does not dominate the evening atmosphere.
Also consider how the shade and beam angle affect the perceived brightness. An enclosed diffuser spreads light differently from a narrow directional fixture. Dark wall materials absorb more illumination, while pale surfaces reflect it and can make the same fixture appear brighter.
Dimming can provide useful flexibility in entertaining areas, but the fixture, driver, bulbs, and control must be compatible. Check the product specifications before selecting a dimmer.
Confirm the Weather Rating
Indoor wall lights should never be assumed suitable for exterior use. Outdoor fixtures must tolerate rain, condensation, dust, temperature changes, and prolonged exposure to sunlight. Check the manufacturer’s location or ingress-protection rating and make sure it is appropriate for the intended position.
A light under a deep covered porch experiences different conditions from one mounted on an exposed coastal wall. Properties near the sea also require materials and finishes capable of resisting salt-related corrosion. Powder-coated aluminium, stainless steel, brass, and properly sealed glass are common exterior options, but their suitability depends on construction quality and maintenance.
When researching different materials and styles, broader ranges from Dazuma Lighting can help homeowners compare exterior fixtures alongside other lighting categories and plan a more coordinated scheme.
Consider Motion Sensors and Timers
A motion sensor can be helpful beside a side gate, garage, bin-storage area, or less frequently used entrance. It provides light when someone approaches without leaving the fixture operating throughout the night. However, poor sensor placement may allow passing traffic, pets, or moving plants to trigger it repeatedly.
Choose a model with adjustable detection range, sensitivity, and operating time where possible. Aim the sensor towards the area people actually use rather than towards the street or a neighbouring property.
Photocells and timers offer another approach. A photocell turns the light on when natural light levels fall, while a timer can switch it off later in the evening. Combining automatic control with efficient LEDs can reduce unnecessary energy use.
Plan a Consistent Exterior Scheme
A home may need several types of outdoor light, but they should still feel related. Entrance lanterns, patio sconces, garage lights, and landscape fixtures do not have to come from one collection. They can be coordinated through finish, shape, glass style, colour temperature, or beam character.
Avoid allowing every fixture to compete for attention. Choose one important area—usually the main entrance—as the visual focus. Supporting lights can then use simpler forms or lower brightness levels. This hierarchy gives the exterior depth without making it appear overdesigned.
View the complete plan from the street before purchasing. Consider which lights will be visible together and how they relate to windows, doors, rooflines, and landscaping.
Install Outdoor Fixtures Safely
Exterior electrical work must be protected from moisture and completed with suitable weatherproof components. The mounting surface should be stable, and cable entries must be sealed according to the fixture manufacturer’s instructions. Avoid trapping water behind the fitting or blocking drainage features designed into the product.
If new wiring, circuit alterations, or unfamiliar electrical connections are required, use a qualified electrician. Professional installation is especially important where the wall is exposed to heavy rain, where the existing wiring is old, or where several fixtures and controls are being added at once.
Keep the Lights Performing Well
Outdoor fixtures require occasional maintenance. Clean glass and diffusers so dirt does not reduce light output. Remove cobwebs, check mounting screws, trim plants that block the beam, and inspect the finish for early signs of corrosion.
After storms or freezing weather, confirm that fittings remain secure and that water has not entered the enclosure. Replace damaged seals and failed bulbs with components that match the original specifications.
A Small Change with a Noticeable Effect
Outdoor wall lighting can improve the appearance, safety, and everyday usability of a home without requiring a major renovation. The best results come from understanding the purpose of each fixture, choosing a suitable scale and beam direction, controlling glare, and using materials designed for the installation environment.
With careful placement and a consistent lighting style, entrances become more welcoming, pathways feel easier to navigate, and architectural details remain visible after sunset. The exterior gains character while continuing to serve the practical needs of the people who use it.

The Ultimate Office Spring Cleaning Checklist for Small Businesses

Optimizing Industrial Packaging Automation: Technical Standards, Electrical Safety, and Line Efficiency

What Are the Effects of Too Much Sun Exposure?

How to Keep a Useful Menstrual Health Diary

7 Meaningful Ways to Preserve Memories From Your Favorite Trips

Who Is Indiana Urban? Inside the Life of Karl Urban’s Son and Rising Actor

Jennifer Seyfried: All About Amanda Seyfried’s Sister, Her Life and Career

Who Is Zachary Hudson? Inside the Private Life of Cindy Williams’ Son

Who Is Stephen G. Walker? All About PinkPantheress’ Father and His Academic Career

Cynthia Womack Biography: The Life, Career, and Legacy of Connie Britton’s Twin Sister
Who Is Indiana Urban? Inside the Life of Karl Urban’s Son and Rising Actor
Jennifer Seyfried: All About Amanda Seyfried’s Sister, Her Life and Career
Who Is Zachary Hudson? Inside the Private Life of Cindy Williams’ Son
Who Is Stephen G. Walker? All About PinkPantheress’ Father and His Academic Career
Cynthia Womack Biography: The Life, Career, and Legacy of Connie Britton’s Twin Sister
-
Biography7 months ago
Who Is Indiana Urban? Inside the Life of Karl Urban’s Son and Rising Actor
-
Biography7 months ago
Jennifer Seyfried: All About Amanda Seyfried’s Sister, Her Life and Career
-
Biography7 months ago
Who Is Zachary Hudson? Inside the Private Life of Cindy Williams’ Son
-
 Biography6 months ago
Who Is Stephen G. Walker? All About PinkPantheress’ Father and His Academic Career
-
Biography8 months ago
Cynthia Womack Biography: The Life, Career, and Legacy of Connie Britton’s Twin Sister
-
 Biography7 months ago
Who is Lynn Levesque? Everything to Know About Triple H’s Sister
-
 Biography8 months ago
Who Was Gretchen Knauff? The Private Life of Jennifer Coolidge’s Mother
-
 Biography7 months ago
Lynn Payne: Inside the Life and Love Story of Randy Savage’s Wife