
Home & Garden
Why Professional AC Installation Changes Everything at Home


Getting a new air conditioner is exciting—until you realize the installation can make or break the entire investment. A poorly installed system wastes energy, breaks down faster, and leaves your home feeling uncomfortable no matter how powerful the unit is. At Rapid Response Air Conditioning Repair, professional AC installation is handled with the precision and care your home deserves, from the very first measurement to the final test run.
Most homeowners focus on choosing the right unit and overlook the installation process entirely. That’s where problems begin. The brand, the capacity, the energy rating—none of it matters if the system is set up incorrectly. Oversized units short-cycle, meaning they turn on and off too quickly to properly dehumidify your space. Undersized ones run constantly, driving up energy bills without ever reaching the set temperature. Getting this balance right requires experience, tools, and a clear understanding of your home’s specific layout and insulation.
Rapid Response Air Conditioning Repair brings all of that to every job.
What Makes a Quality AC Installation Worth It?
A professionally installed air conditioner performs better from day one. Refrigerant levels are charged correctly. Ductwork connections are sealed tight. Electrical wiring meets local code requirements. These aren’t just technicalities—they directly affect how well your system cools your home and how long it lasts.
Shoddy installation shortcuts can void manufacturer warranties too. Many HVAC manufacturers require certified installation to honor their coverage terms. That means a substandard setup doesn’t just cost you now; it could leave you without warranty protection when something goes wrong later.
With Rapid Response Air Conditioning Repair, you get technicians who know the equipment inside out. They size the system correctly, handle the refrigerant safely, and ensure every component is tested before they leave.
How Does Proper Sizing Affect AC Performance Long-Term?
Sizing is one of the most critical—and most misunderstood—parts of an AC installation. It goes far beyond square footage. Ceiling height, window placement, local climate, insulation quality, and even the number of occupants in the home all factor into the right calculation.
When a unit is the wrong size, the consequences show up quickly:
- Too large: The system cools too fast, never completing a full cycle. Humidity stays high, and components wear out prematurely.
- Too small: The unit runs nonstop trying to keep up, consuming excessive energy and breaking down far sooner than expected.
Rapid Response Air Conditioning Repair performs proper Manual J load calculations—the industry standard for determining the exact cooling capacity a home requires. This step alone protects your investment for years to come.
What Happens During a Professional AC Installation?
Many homeowners wonder what the process actually looks like from start to finish. Here’s what a thorough, professional installation covers:
Site Assessment: Before any equipment is ordered or installed, a technician evaluates the space—measuring rooms, checking existing ductwork, assessing electrical capacity, and identifying the ideal location for both the indoor and outdoor units.
Equipment Selection: Based on the load calculation and site assessment, the right unit is selected. Energy efficiency ratings (SEER2), brand reliability, and budget considerations all come into play at this stage.
Installation Day: This involves mounting the air handler or evaporator coil, placing the condenser unit outdoors on a level pad, running refrigerant lines, connecting electrical wiring, and integrating the thermostat. Every connection is made to manufacturer specifications.
System Commissioning: Once installation is complete, the system is powered on and tested. Technicians check airflow, refrigerant pressure, thermostat calibration, and overall performance before signing off.
Rapid Response Air Conditioning Repair follows this process on every job—no shortcuts, no guesswork.
Why Rapid Response Air Conditioning Repair Stands Apart
Speed and quality rarely go together in home services. Rapid Response Air Conditioning Repair is built around delivering both. When summer heat arrives without warning, delays aren’t just inconvenient—they’re genuinely uncomfortable and, for vulnerable household members, potentially dangerous.
The team at Rapid Response Air Conditioning Repair arrives prepared. Vehicles are stocked with commonly needed parts and tools, reducing wait times and unnecessary delays. Technicians communicate clearly, respect your home, and don’t leave until the system is running exactly as it should.
AC Installation done right by a trusted professional team means lower energy bills, fewer breakdowns, longer equipment life, and a home that stays comfortable no matter how extreme the weather gets outside.
That combination—fast response and expert execution—is what makes Rapid Response Air Conditioning Repair the right call for homeowners who don’t want to gamble on something as essential as their home cooling system.
The Right Time to Install a New AC System
Timing matters more than most people realize. Scheduling a new installation before peak summer demand hits means shorter wait times, more flexible scheduling, and a system that’s fully operational before temperatures climb. Spring is ideal. Fall works well too, especially for homes in warmer climates that rely on cooling year-round.
That said, when an older system fails mid-summer, Rapid Response Air Conditioning Repair is equipped to move quickly. Emergency replacement installations are handled with the same level of care and thoroughness as planned upgrades—because cutting corners to save time is never an acceptable trade-off.
Ready for a Cooler, More Comfortable Home?
A new air conditioner is a significant investment, and how it gets installed determines how well that investment pays off. Rapid Response Air Conditioning Repair combines technical expertise with reliable service to deliver installations that perform from day one and hold up for years.
Homeowners in the area trust Rapid Response Air Conditioning Repair because results speak louder than promises. If your current system is aging, inefficient, or simply failing to keep up—now is the right time to make a change.
Contact Rapid Response Air Conditioning Repair today to schedule your AC installation consultation.

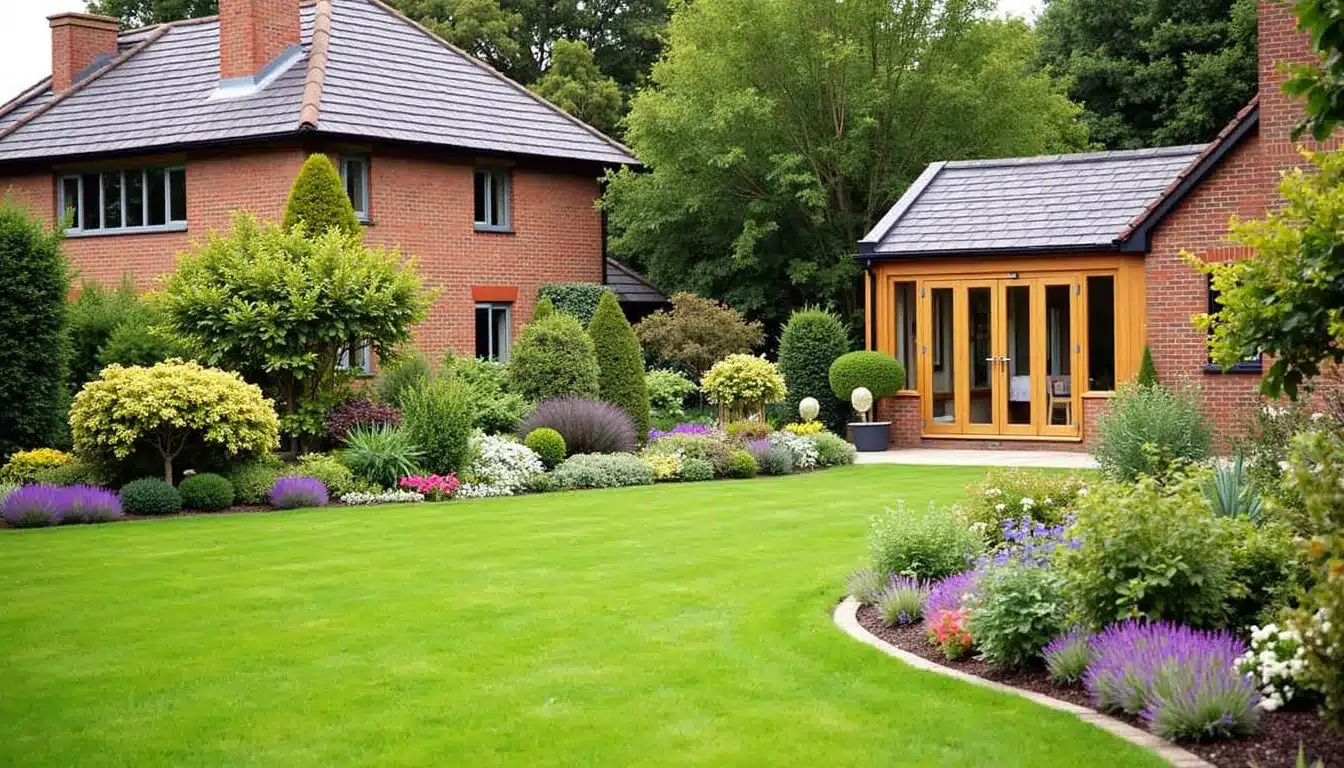
You’ve spent months dragging yourself through interior updates. The walls have fresh paint, the carpets are clean, and you finally replaced that kitchen tap that sounded like it was gargling gravel every time you turned it on.
Then, a potential buyer pulls up, takes one look at your front garden, and immediately starts calculating how many thousands they can knock off their offer.
So, before you stick a ‘For Sale’ sign out front, let’s talk about why the outside of your home deserves just as much love as the inside.
Improving First Impressions
Your garden is the opening line of your property’s sales pitch, and first impressions form fast. When someone walks up to a neatly edged lawn, trimmed hedges, and a clear path, they assume the rest of the house has been looked after with the same level of care.
On the other hand, if the outside looks neglected, buyers will start wondering what else has been left to slide. That cracked paving slab becomes evidence of deeper structural issues, and that bramble poking through the fence suddenly suggests years of negligence.
You don’t need topiary sculptures or a water feature to make a good impression. Just keep the lawn cut, the edges neat, and the path clear of weeds.
These are small jobs that take an afternoon, but they shape how people feel about your entire property within the first 10 seconds.
Making Your Outdoor Space More Usable
A garden that looks like a nature reserve might be great for local wildlife, but it won’t help you sell a house. Buyers want to imagine themselves using the space, and that’s hard to do when you can’t see the patio because of the brambles.
So, think about how your garden functions, not just how it looks. Can someone walk across the lawn without hiking boots? Do you have a clear spot for a table and chairs, or does setting up a deckchair require a machete and hours of hacking at overgrown vegetation?
If you’ve got a decent-sized outdoor space, play to its strengths. A usable garden in Croydon is a genuine selling point, especially when so many properties in South London are competing for attention with little more than paved yards.
Protecting the Property
Neglected outdoor spaces can cause real problems for the structure of your home, and those issues tend to pop up at the worst possible moment.
Overgrown trees and shrubs pushing against walls or rooflines can crack render, lift roof tiles, and block gutters until they overflow. On the other hand, roots from large trees can interfere with foundations and drainage.
Blocked drains are another classic. Leaves, moss, and debris build up until one heavy downpour sends water pooling against your walls instead of flowing away. And once moisture gets into your brickwork, you’ll be looking at eye-watering repair bills.
Then there are fences and boundaries. A leaning fence panel or a gate that doesn’t close properly might not bother you, but a buyer will see it as one more thing they’ll have to sort out.
Making Your Garden Sale-Ready
If you’re gearing up to sell your home, your garden doesn’t need to win any awards. It just needs to look clean, cared for, and easy for someone else to take over without renting a strimmer and a skip.
Tidy and Repair the Essentials
Start with the basics that buyers will clock straight away. Mow the lawn, pull the weeds, prune any overgrown patches, and clear out dead plants or debris that make the space look abandoned.
Then, check your boundaries. Wobbly fence panels, broken gate latches, and cracked paving all scream ‘maintenance backlog’ to anyone viewing the property. Fix them before the first viewing, because buyers usually subtract repair costs from their offer.
If the jobs feel like too much to tackle on your own, professional garden maintenance Croydon companies can get through everything in a day or two.
You’ll save yourself a few weekends of hard graft and end up with a tidier result than most of us would manage armed with a pair of rusty secateurs.
Show It at Its Best
A well-maintained garden won’t help your listing stand out if the photos look like they were taken during a power cut in November. So, photograph the space in good natural light and clear away anything that clutters the view.
Move the bins, tuck away the hosepipe, and resist the urge to leave your gardening gloves draped artistically over the fence. You want your garden to look like a place where someone would sit with a glass of wine, not a storage area for knickknacks you couldn’t fit in the shed.
Also, include enough photos to show the full layout and any mature plants or features worth highlighting. Finally, keep the description honest. ‘South-facing with established borders’ is a selling point. ‘Potential to be lovely’ is estate agent code for ‘bring a machete.’
Use Improvements to Support Your Asking Price
A bit of maintenance won’t automatically add the exact amount you spent back onto your property’s value. This is why treating every bag of compost as a financial investment is a recipe for disappointment.
But a well-presented garden does remove one of the easiest reasons for buyers to negotiate your price down. If someone walks around the outside and can’t find anything obvious to complain about, they’ve got fewer cards to play when it comes to making a lower offer.
Think of it as part of the bigger picture. A tidy garden, clean windows, and a well-maintained interior all work together to justify your asking price. No single element does the heavy lifting on its own, but together they tell a buyer that this property has been looked after properly.
Conclusion
Your garden has been shaping how people see your property since the day you moved in. The good news is that getting it into shape doesn’t require a huge budget or specialist knowledge.
So, grab the mower, sort the fence, and let the outside of your home attract buyers for you. You’ve already done the hard work indoors. This is another easy win you don’t want to skip.

Walking through a garden center can feel overwhelming. With endless rows of shrubs, flowers, and trees, how do you decide what belongs in your yard? Picking the wrong plants often leads to wasted money and dead foliage. However, with a solid plan, you can create a thriving landscape that boosts curb appeal and provides enjoyment for years.
This guide breaks down the essential steps to selecting greenery that fits your environment, style, and maintenance ability. By understanding your space and what plants need to survive, you can build a garden that flourishes.
Assess Your Site Conditions
Before buying a single seed or sapling, you must understand the environment where they will live. Plants have specific needs, and ignoring them usually leads to failure.
Sunlight Availability
Observe how the sun moves across your property. Areas that receive six or more hours of direct sun are considered “full sun.” Locations with three to six hours have “partial shade,” while spots with less than three hours of direct light are “full shade.” Buying a shade-loving hosta for a sun-drenched corner will scorch its leaves, while putting a rose bush in deep shade will result in poor blooms and disease.
Soil Quality
Your soil type dictates how water drains and what nutrients are available. Clay soil holds water but can suffocate roots if it gets too compacted. Sandy soil drains quickly but might not retain enough moisture or food for hungry plants. You can improve most soil with compost, but choosing species adapted to your native ground is always easier.
Hardiness Zones
The USDA Plant Hardiness Zone Map is a critical tool. It divides regions by their average minimum winter temperature. Ensure any perennial, shrub, or tree you select is rated for your specific zone. If you choose a tropical plant for a northern climate, it will not survive the winter outdoors without significant protection.
Define the Purpose of Your Plants
Every plant in your landscape should have a job. Knowing what you want to achieve helps narrow down the massive selection available.
Creating Privacy and Screening
If your goal is to block a view of the neighbor’s garage or reduce street noise, look for dense, fast-growing evergreens. Arborvitae or holly bushes can form living walls that provide year-round coverage.
Adding Color and Interest
Deciduous shrubs and flowering perennials bring seasonal excitement. Plan for a succession of blooms so something is always colorful from spring through fall. Bulbs like tulips work for early spring, while daylilies shine in summer, and mums offer autumn vibrancy.
providing Shade and Structure
Trees are the anchors of a landscape. A large oak or maple provides cooling shade that can lower energy bills. Smaller ornamental trees, like dogwoods or Japanese maples, add structural beauty and focal points near patios or entryways.
Consider Maintenance Levels
Be honest about how much time you want to spend working in the yard. Some landscapes require weekly attention, while others thrive on neglect.
High-Maintenance Options
Roses, fruit trees, and formal hedges often need regular pruning, fertilizing, and pest control. If you love gardening as a hobby, these are rewarding choices. If you prefer to relax on weekends, they might become a burden.
Low-Maintenance Alternatives
Native plants are generally the best choice for easy care. Because they evolved in your region, they are adapted to local rainfall and pests. Ornamental grasses and sedums are other excellent low-maintenance picks that look great with minimal effort. When visiting a Salt Lake City plant nursery or a local garden center in your specific region, ask the staff to point out species that are drought-tolerant and disease-resistant.
Spatial Planning and Growth Habits
One of the most common mistakes is planting for the current size of the pot, not the mature size of the plant.
Give Plants Room to Breathe
That small juniper might look cute now, but if the tag says it grows eight feet wide, believe it. Planting too close to your house or walkways leads to constant pruning battles later. Proper spacing ensures good air circulation, which reduces fungal diseases.
Layering for Depth
Think vertically when arranging your beds. Place tall plants in the back, medium-sized ones in the middle, and low-growing ground covers in the front. This layering technique creates visual depth and ensures every plant gets seen.
Water Requirements
Group plants with similar water needs together. This practice, known as hydro-zoning, saves water and keeps plants healthy. You should not put a thirsty willow tree next to a drought-loving lavender bush because you will either drown one or dehydrate the other.
Choosing the right plants involves research and patience. By analyzing your sunlight, soil, and lifestyle, you can select varieties that will thrive in your specific landscape. The result will be a beautiful, sustainable outdoor space that adds value to your home.
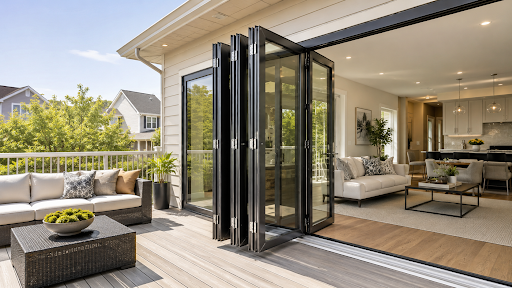
What are folding patio doors?
Folding patio doors are glazed door systems whose panels hinge to each other and stack to one or both sides of an opening. Each panel rides a track, the leaves fold in pairs, and a 16-foot opening can clear almost completely. Residential systems carry 2 to 10 panels, and the panel count drives both the hardware schedule and the price. New Jersey plan sets file the category under three names: folding patio door, bi-fold door, and accordion door.
Folding patio doors differ from sliding doors in one structural respect: the panels leave the plane of the wall. A folding system stacks its leaves perpendicular to the wall, so the layout needs clear stack space beside the opening. The International Residential Code (IRC), adopted in New Jersey through the Uniform Construction Code, treats the assembly as an exterior door. Landing and threshold rules follow from that classification.
How do folding patio door configurations work?
Folding patio door configurations are written as a panel count plus a stacking direction. A four-panel set that folds entirely to the left reads as 4L, and the same four panels splitting evenly read as 2L2R. Manufacturers count panels from the exterior, so a drawing note matches the site only when the viewing side is stated.
Traffic panel choice separates daily use from seasonal use. A traffic panel, also called an access door, is a single leaf hinged at the jamb that swings without moving the rest of the stack. Systems without one need the full set to fold before anyone steps outside, which suits a screened porch more than a kitchen exit.
Panel width and weight cap the practical count. Residential aluminum systems commonly hold a single leaf near 42 inches wide, and leaf weights reach 250 pounds at full height. Hardware schedules list a maximum leaf weight, and that figure, not the opening width, sets the final panel count.
Which threshold types are used at the sill?
Threshold type governs water management, flooring transitions, and accessibility at every folding door. Three sill families cover almost all New Jersey installations, and each one trades weather resistance against a flat walking surface. The sill decision belongs on the drawing before the slab pour, because sill height sets the subfloor detail.
Weathered sill
Weathered sills raise a rebated upstand of 2 inches or more between the interior floor and the track. The upstand holds wind-driven rain outside and feeds weep channels, the small drainage openings that carry water away. Water penetration ratings run highest in this family, which is why exposed elevations and shore-facing walls use it.
Low-profile sill
Low-profile sills stand near 1 inch above the finished interior floor and keep a shallow drainage channel inside the track. The reduced upstand still sheds water on protected elevations, such as a wall under a deep roof overhang. Tested water ratings sit below the weathered version, and the product data sheet records the tested pressure.
Flush sill
Flush sills, also called zero thresholds, finish level with the interior floor and drain through a trench grate outside. Americans with Disabilities Act (ADA) Standards for Accessible Design limit a threshold at a doorway to 0.5 inch, with a bevel required above 0.25 inch. Flush details need a recessed structural pocket, a linear drain, and positive slope away from the opening.
How do New Jersey codes shape the opening?
New Jersey regulates door openings through the Uniform Construction Code, which adopts the IRC and the International Energy Conservation Code (IECC) as subcodes. The IRC limits the drop from the top of the threshold to the exterior landing at a required egress door to 1.5 inches. Deck and patio elevations therefore get set against the sill height rather than the reverse.
Energy limits follow climate zone. Most New Jersey counties sit in IECC climate zone 4A, and the northwestern highlands fall into zone 5A. The prescriptive fenestrationU-factor, the measure of heat loss through a whole window or door assembly, is 0.32 in zone 4 and 0.30 in zone 5. The frame reaches those numbers with a thermal break, an insulating polyamide strip between the interior and exterior aluminum.
Wind pressure governs hardware and glass on exposed sites. Coastal New Jersey counties carry higher design wind pressures than inland ones, and the required design pressure rating appears on the manufacturer’s certification label. The North American Fenestration Standard, published as AAMA/WDMA/CSA 101/I.S.2/A440, reports air, water, and structural results on one certification line.
What does the structural opening require?
Structural openings for folding doors carry a deflection limit tighter than a standard wall opening. Specifications for a glazed folding system commonly set header deflection at L/600, meaning the beam moves no more than its span divided by 600. A 16-foot header at that limit moves less than one third of an inch. Deflection past the limit binds the panels and drags the track.
Top-hung and bottom-rolling systems load the building differently. A top-hung system suspends every panel from the header track, so the beam above carries the full glass weight. Renovation projects in older New Jersey housing stock often use bottom-rolling hardware, since upgrading an existing header means opening the wall above.
Installation tolerance stays narrow across the whole assembly. ASTM E2112, the standard practice for installing exterior windows and doors, calls for a sill pan with end dams and a back dam under the unit. Out-of-level sills show up immediately in a folding door, because the panels hang in series and a small twist multiplies across the stack.
A specification sequence that prevents rework runs in four steps:
- Record the rough opening, the stack side, and the traffic panel location.
- Fix the sill type against the exterior finish elevation and the drainage path.
- Size the header for the deflection limit and the hardware weight.
- Match the glass to the climate zone U-factor and the site design pressure.
Configuration and threshold reference table
Configuration and threshold pairings follow the exposure and the daily use of each opening. The table sets out common residential combinations in New Jersey.
| Configuration | Typical opening width | Sill that fits | Construction note |
| 2L or 2R | 6 to 8 feet | Weathered or low-profile | Standard header, stack depth under 4 feet |
| 3L or 3R | 9 to 12 feet | Low-profile under cover | Traffic panel keeps daily access simple |
| 2L2R | 12 to 16 feet | Weathered on exposed walls | Both jambs need stack space |
| 3L3R | 18 to 24 feet | Flush with a trench drain | Engineered header, structural review |
What drives the cost and lead time?
Cost on a folding patio door builds from four separate line items rather than one price per foot. Panel count sets the hardware and the labor hours, and sill type sets the drainage and flooring work. The glass package sets the U-factor and the acoustic result, while frame material moves the base price. Quotes returned for folding patio doors nj vary widely because those items get priced separately.
Structural work sits outside most door quotes. Header replacement, a new footing under a stack point, and a trench drain at a flush sill are construction costs. A folding patio doors nj quote that leaves out the sill type and the drainage detail leaves the flooring interface undefined.
Regional supply chains shape lead time more than list prices do. European profile suppliers such as Reynaers, Schüco, and Rehau stand behind many aluminum folding systems sold in New Jersey. Buyers searching for folding patio doors nj reach fabricators who run design, permit drawings, manufacturing, and installation as one chain. Vision Art Aluminium works that way from a Montclair showroom covering New Jersey and New York.
Common mistakes in folding door drawings
Drawing errors on folding door openings repeat in a small set of patterns, and each one surfaces after the frame reaches the site.
- Stack space left off the plan, which parks the folded panels in front of a window.
- Sill type unspecified, so the flooring contractor sets the finished height before the door detail exists.
- Exterior landing poured level with a flush sill, with no trench drain and no slope away from the wall.
- Traffic panel swing drawn from the interior while the manufacturer counts from the exterior.
Which configuration fits which New Jersey opening?
Opening width and exposure decide the configuration faster than style preference does. Openings up to 12 feet work with two or three panels and a low-profile sill on a covered elevation. Openings past 16 feet move to a split stack, an engineered header, and a weathered sill on any exposed wall. Flush thresholds suit projects that can build a trench drain into the slab. Traffic panel placement, stack side, and sill height stay fixed after fabrication.
Product specifications, code editions, and prices change over time. Verify the current New Jersey subcode edition and the local design pressure requirement with the municipal construction office. Confirm the manufacturer’s tested ratings on the product data sheet before ordering.
Frequently Asked Questions
What is a folding patio door?
A folding patio door is a glazed door system whose panels hinge together and stack to one or both sides of an opening. Residential systems run from two to ten panels. The design clears most of the opening, while a sliding door keeps one panel across the width.
Which threshold type handles New Jersey weather?
Threshold performance rises with the height of the upstand. A weathered sill of 2 inches or more resists wind-driven rain on exposed elevations and shore-facing walls. A low-profile sill near 1 inch suits walls under a deep overhang. A flush sill needs a trench drain and positive slope to match either one.
How much stack space does a folding patio door need?
Stack space equals the panel width plus a small allowance for each folded leaf and its hardware. A four-panel system with 42-inch leaves stacking one way projects about 4 feet from the jamb. That depth lands inside the room on an inward stack and on the terrace outside.
Do folding patio doors need a permit in New Jersey?
New Jersey’s Uniform Construction Code requires a construction permit whenever a project creates or enlarges a structural opening. Cutting a wall for a folding door falls under that rule, and a sealed structural detail normally accompanies the application. Municipal construction offices confirm whether a same-size replacement counts as ordinary maintenance.
How does a folding patio door differ from a sliding door?
A folding patio door stacks its panels perpendicular to the wall and clears nearly the entire opening. A sliding door parks panels behind one another and keeps at least one panel across the width. Folding systems carry more hardware, more weather seals, and a heavier header load.

The Ultimate Office Spring Cleaning Checklist for Small Businesses

Optimizing Industrial Packaging Automation: Technical Standards, Electrical Safety, and Line Efficiency

What Are the Effects of Too Much Sun Exposure?

How to Keep a Useful Menstrual Health Diary

7 Meaningful Ways to Preserve Memories From Your Favorite Trips

Who Is Indiana Urban? Inside the Life of Karl Urban’s Son and Rising Actor

Jennifer Seyfried: All About Amanda Seyfried’s Sister, Her Life and Career

Who Is Zachary Hudson? Inside the Private Life of Cindy Williams’ Son

Who Is Stephen G. Walker? All About PinkPantheress’ Father and His Academic Career

Cynthia Womack Biography: The Life, Career, and Legacy of Connie Britton’s Twin Sister
Who Is Indiana Urban? Inside the Life of Karl Urban’s Son and Rising Actor
Jennifer Seyfried: All About Amanda Seyfried’s Sister, Her Life and Career
Who Is Zachary Hudson? Inside the Private Life of Cindy Williams’ Son
Who Is Stephen G. Walker? All About PinkPantheress’ Father and His Academic Career
Cynthia Womack Biography: The Life, Career, and Legacy of Connie Britton’s Twin Sister
-
Biography7 months ago
Who Is Indiana Urban? Inside the Life of Karl Urban’s Son and Rising Actor
-
Biography7 months ago
Jennifer Seyfried: All About Amanda Seyfried’s Sister, Her Life and Career
-
Biography7 months ago
Who Is Zachary Hudson? Inside the Private Life of Cindy Williams’ Son
-
 Biography6 months ago
Who Is Stephen G. Walker? All About PinkPantheress’ Father and His Academic Career
-
Biography8 months ago
Cynthia Womack Biography: The Life, Career, and Legacy of Connie Britton’s Twin Sister
-
 Biography7 months ago
Who is Lynn Levesque? Everything to Know About Triple H’s Sister
-
 Biography8 months ago
Who Was Gretchen Knauff? The Private Life of Jennifer Coolidge’s Mother
-
 Biography7 months ago
Lynn Payne: Inside the Life and Love Story of Randy Savage’s Wife