
Home & Garden
Why Tankless Water Heaters Are Changing the Way We Think About Hot Water

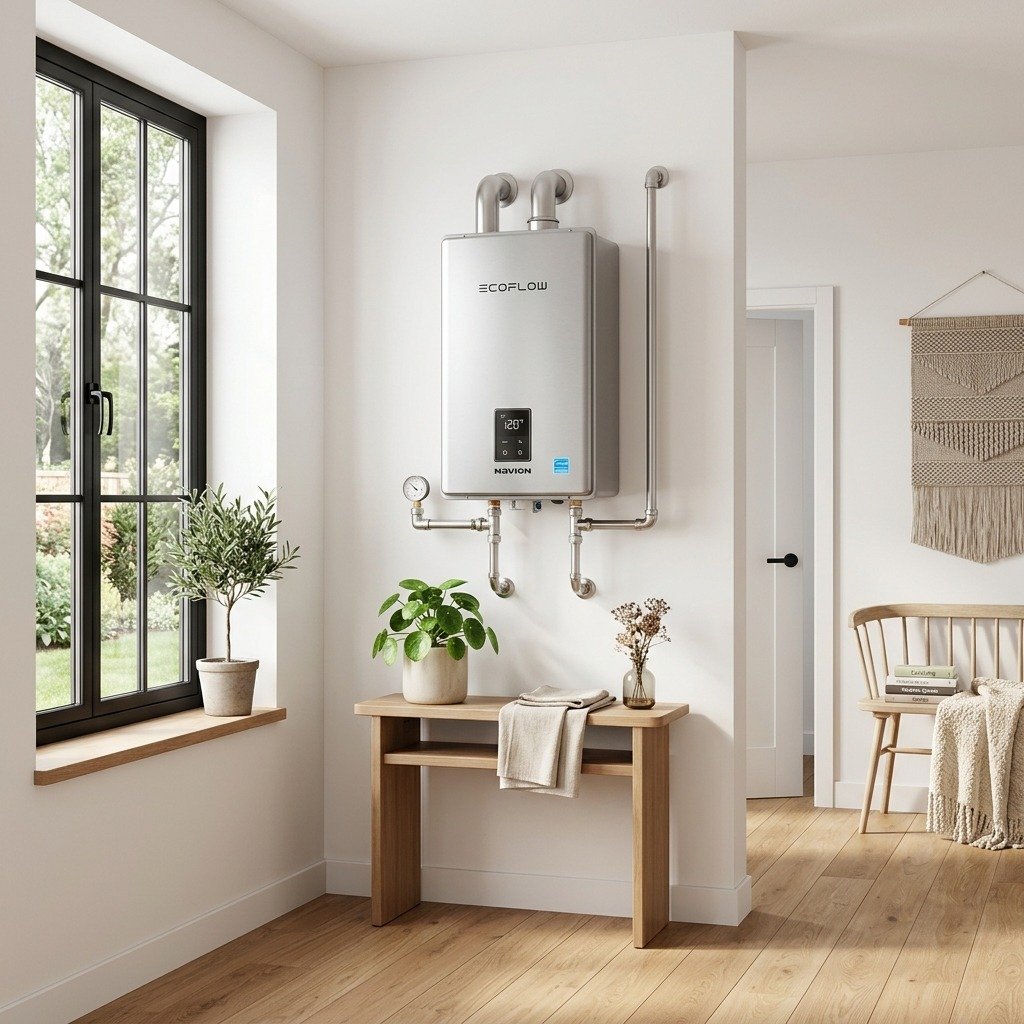
Hot water is one of those things you never think about—until you don’t have it. A cold shower at 6 AM has a way of making you reconsider every decision you’ve ever made about your home’s plumbing. The good news? There’s a better way to heat your water, and more homeowners are making the switch every year.
Tankless water heaters have moved from a niche upgrade to a mainstream home improvement priority. And once you understand what they actually do—and what they save you—it’s easy to see why.
What Makes Tankless Water Heaters Different?
Traditional water heaters store 40 to 80 gallons of water in a tank, keeping it heated around the clock whether you need it or not. That constant energy use adds up fast. Tankless systems work differently. They heat water on demand, only activating when you turn on a tap or run the shower.
No tank. No standby heat loss. No waiting for a 50-gallon tank to refill and reheat after the morning rush.
The result is a system that delivers a continuous flow of hot water while consuming significantly less energy. According to the U.S. Department of Energy, tankless water heaters can be 24–34% more energy-efficient than conventional storage tank models for homes that use 41 gallons or less of hot water daily.
The Real Benefits Homeowners Are Experiencing
Endless Hot Water, On Your Schedule
One of the most immediate changes homeowners notice after switching is the consistency. No more rationing hot water between family members. No more timing your shower around the dishwasher. Tankless systems deliver hot water for as long as you need it—whether that’s a 10-minute shower or back-to-back loads of laundry.
Lower Energy Bills, Month After Month
Because tankless units only fire up when hot water is actually needed, they eliminate the standby energy loss that plagues traditional tanks. For many households, this translates to a noticeable reduction in monthly utility costs. Over the lifespan of the unit, those savings compound significantly.
More Space, Better Use of Your Home
A standard water heater tank is bulky. It occupies a dedicated corner of your garage, basement, or utility closet. Tankless units are compact—typically wall-mounted—and free up that square footage for storage or simply a cleaner, more organized space.
A Longer Lifespan Than You’d Expect
Traditional water heaters typically last 10 to 13 years. Tankless models, when properly maintained, routinely last 20 years or more. That extended lifespan means fewer replacements, less waste, and a lower long-term cost of ownership.
Is a Tankless Water Heater Right for Your Home?
The short answer: for most households, yes. But a few factors are worth considering before making the switch.
Household size and water usage play the biggest role. A single-point-of-use tankless unit works well for a small apartment or a single bathroom. Larger homes with multiple bathrooms running simultaneously may benefit from a whole-home unit or multiple units installed in parallel.
Gas vs. electric is another consideration. Gas-powered tankless heaters tend to deliver higher flow rates, making them better suited for larger households. Electric models are easier to install and are a strong choice for smaller homes or supplemental applications.
Upfront cost vs. long-term savings is the trade-off most homeowners weigh. Tankless units cost more to purchase and install than traditional tanks. However, the combination of lower energy bills, reduced maintenance, and a longer lifespan means the investment pays off over time—often within 5 to 7 years for an average household.
What the Installation Process Actually Looks Like
A professional installation typically takes a few hours and involves assessing your home’s existing gas lines or electrical capacity, selecting the right unit size for your usage, and safely removing your old system. A licensed plumber ensures the unit is sized correctly for your flow rate needs and that all connections meet local code requirements.
Trying to cut corners on installation is where homeowners run into trouble. An undersized unit will struggle to keep up with demand. An improperly vented gas unit poses safety risks. Getting the job done right the first time saves both money and headaches down the road.
Making the Switch With Confidence
Tankless Water Heaters bring a meaningful combination of long-term energy savings, continuous hot water delivery, and reduced environmental impact that makes them one of the most practical home upgrades a homeowner can choose for lasting comfort and efficiency.
Magnum Plumbing Company Inc. provides professional tankless water heater installation, replacement, and maintenance services for homeowners who want reliable hot water without the inefficiency of an aging tank system. From helping you select the right unit for your home’s specific needs to handling every detail of the installation, the team is committed to delivering results that last.
If your current water heater is aging, underperforming, or simply costing too much to run each month, now is a great time to explore what a tankless system can do for your home.
Frequently Asked Questions About Tankless Water Heaters
How long does it take to install a tankless water heater?
Most installations are completed within 2 to 4 hours, depending on the complexity of your home’s existing plumbing and whether a gas line upgrade or electrical panel adjustment is required.
Will a tankless water heater work during a power outage?
Gas-powered tankless water heaters require electricity to ignite and operate their controls, so they will not function during a power outage without a backup power source. Electric models are also affected by outages.
How often does a tankless water heater need maintenance?
Most manufacturers recommend annual maintenance, which typically involves flushing the system to remove mineral buildup. In areas with hard water, more frequent maintenance may be necessary to maintain peak performance.
Can a tankless water heater supply hot water to an entire house?
Yes. A properly sized whole-home tankless unit can handle multiple simultaneous hot water demands. A licensed plumber can assess your household’s peak usage to recommend the right unit capacity.
What is the average lifespan of a tankless water heater?
With regular maintenance, tankless water heaters commonly last 20 years or more—roughly double the lifespan of a conventional storage tank water heater.

Walking through a garden center can feel overwhelming. With endless rows of shrubs, flowers, and trees, how do you decide what belongs in your yard? Picking the wrong plants often leads to wasted money and dead foliage. However, with a solid plan, you can create a thriving landscape that boosts curb appeal and provides enjoyment for years.
This guide breaks down the essential steps to selecting greenery that fits your environment, style, and maintenance ability. By understanding your space and what plants need to survive, you can build a garden that flourishes.
Assess Your Site Conditions
Before buying a single seed or sapling, you must understand the environment where they will live. Plants have specific needs, and ignoring them usually leads to failure.
Sunlight Availability
Observe how the sun moves across your property. Areas that receive six or more hours of direct sun are considered “full sun.” Locations with three to six hours have “partial shade,” while spots with less than three hours of direct light are “full shade.” Buying a shade-loving hosta for a sun-drenched corner will scorch its leaves, while putting a rose bush in deep shade will result in poor blooms and disease.
Soil Quality
Your soil type dictates how water drains and what nutrients are available. Clay soil holds water but can suffocate roots if it gets too compacted. Sandy soil drains quickly but might not retain enough moisture or food for hungry plants. You can improve most soil with compost, but choosing species adapted to your native ground is always easier.
Hardiness Zones
The USDA Plant Hardiness Zone Map is a critical tool. It divides regions by their average minimum winter temperature. Ensure any perennial, shrub, or tree you select is rated for your specific zone. If you choose a tropical plant for a northern climate, it will not survive the winter outdoors without significant protection.
Define the Purpose of Your Plants
Every plant in your landscape should have a job. Knowing what you want to achieve helps narrow down the massive selection available.
Creating Privacy and Screening
If your goal is to block a view of the neighbor’s garage or reduce street noise, look for dense, fast-growing evergreens. Arborvitae or holly bushes can form living walls that provide year-round coverage.
Adding Color and Interest
Deciduous shrubs and flowering perennials bring seasonal excitement. Plan for a succession of blooms so something is always colorful from spring through fall. Bulbs like tulips work for early spring, while daylilies shine in summer, and mums offer autumn vibrancy.
providing Shade and Structure
Trees are the anchors of a landscape. A large oak or maple provides cooling shade that can lower energy bills. Smaller ornamental trees, like dogwoods or Japanese maples, add structural beauty and focal points near patios or entryways.
Consider Maintenance Levels
Be honest about how much time you want to spend working in the yard. Some landscapes require weekly attention, while others thrive on neglect.
High-Maintenance Options
Roses, fruit trees, and formal hedges often need regular pruning, fertilizing, and pest control. If you love gardening as a hobby, these are rewarding choices. If you prefer to relax on weekends, they might become a burden.
Low-Maintenance Alternatives
Native plants are generally the best choice for easy care. Because they evolved in your region, they are adapted to local rainfall and pests. Ornamental grasses and sedums are other excellent low-maintenance picks that look great with minimal effort. When visiting a Salt Lake City plant nursery or a local garden center in your specific region, ask the staff to point out species that are drought-tolerant and disease-resistant.
Spatial Planning and Growth Habits
One of the most common mistakes is planting for the current size of the pot, not the mature size of the plant.
Give Plants Room to Breathe
That small juniper might look cute now, but if the tag says it grows eight feet wide, believe it. Planting too close to your house or walkways leads to constant pruning battles later. Proper spacing ensures good air circulation, which reduces fungal diseases.
Layering for Depth
Think vertically when arranging your beds. Place tall plants in the back, medium-sized ones in the middle, and low-growing ground covers in the front. This layering technique creates visual depth and ensures every plant gets seen.
Water Requirements
Group plants with similar water needs together. This practice, known as hydro-zoning, saves water and keeps plants healthy. You should not put a thirsty willow tree next to a drought-loving lavender bush because you will either drown one or dehydrate the other.
Choosing the right plants involves research and patience. By analyzing your sunlight, soil, and lifestyle, you can select varieties that will thrive in your specific landscape. The result will be a beautiful, sustainable outdoor space that adds value to your home.
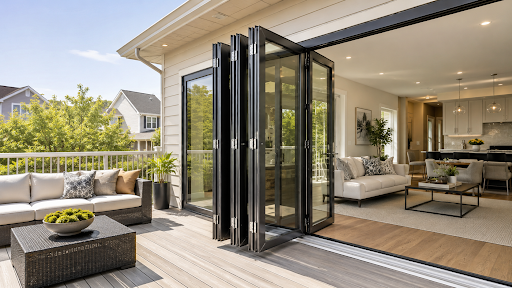
What are folding patio doors?
Folding patio doors are glazed door systems whose panels hinge to each other and stack to one or both sides of an opening. Each panel rides a track, the leaves fold in pairs, and a 16-foot opening can clear almost completely. Residential systems carry 2 to 10 panels, and the panel count drives both the hardware schedule and the price. New Jersey plan sets file the category under three names: folding patio door, bi-fold door, and accordion door.
Folding patio doors differ from sliding doors in one structural respect: the panels leave the plane of the wall. A folding system stacks its leaves perpendicular to the wall, so the layout needs clear stack space beside the opening. The International Residential Code (IRC), adopted in New Jersey through the Uniform Construction Code, treats the assembly as an exterior door. Landing and threshold rules follow from that classification.
How do folding patio door configurations work?
Folding patio door configurations are written as a panel count plus a stacking direction. A four-panel set that folds entirely to the left reads as 4L, and the same four panels splitting evenly read as 2L2R. Manufacturers count panels from the exterior, so a drawing note matches the site only when the viewing side is stated.
Traffic panel choice separates daily use from seasonal use. A traffic panel, also called an access door, is a single leaf hinged at the jamb that swings without moving the rest of the stack. Systems without one need the full set to fold before anyone steps outside, which suits a screened porch more than a kitchen exit.
Panel width and weight cap the practical count. Residential aluminum systems commonly hold a single leaf near 42 inches wide, and leaf weights reach 250 pounds at full height. Hardware schedules list a maximum leaf weight, and that figure, not the opening width, sets the final panel count.
Which threshold types are used at the sill?
Threshold type governs water management, flooring transitions, and accessibility at every folding door. Three sill families cover almost all New Jersey installations, and each one trades weather resistance against a flat walking surface. The sill decision belongs on the drawing before the slab pour, because sill height sets the subfloor detail.
Weathered sill
Weathered sills raise a rebated upstand of 2 inches or more between the interior floor and the track. The upstand holds wind-driven rain outside and feeds weep channels, the small drainage openings that carry water away. Water penetration ratings run highest in this family, which is why exposed elevations and shore-facing walls use it.
Low-profile sill
Low-profile sills stand near 1 inch above the finished interior floor and keep a shallow drainage channel inside the track. The reduced upstand still sheds water on protected elevations, such as a wall under a deep roof overhang. Tested water ratings sit below the weathered version, and the product data sheet records the tested pressure.
Flush sill
Flush sills, also called zero thresholds, finish level with the interior floor and drain through a trench grate outside. Americans with Disabilities Act (ADA) Standards for Accessible Design limit a threshold at a doorway to 0.5 inch, with a bevel required above 0.25 inch. Flush details need a recessed structural pocket, a linear drain, and positive slope away from the opening.
How do New Jersey codes shape the opening?
New Jersey regulates door openings through the Uniform Construction Code, which adopts the IRC and the International Energy Conservation Code (IECC) as subcodes. The IRC limits the drop from the top of the threshold to the exterior landing at a required egress door to 1.5 inches. Deck and patio elevations therefore get set against the sill height rather than the reverse.
Energy limits follow climate zone. Most New Jersey counties sit in IECC climate zone 4A, and the northwestern highlands fall into zone 5A. The prescriptive fenestrationU-factor, the measure of heat loss through a whole window or door assembly, is 0.32 in zone 4 and 0.30 in zone 5. The frame reaches those numbers with a thermal break, an insulating polyamide strip between the interior and exterior aluminum.
Wind pressure governs hardware and glass on exposed sites. Coastal New Jersey counties carry higher design wind pressures than inland ones, and the required design pressure rating appears on the manufacturer’s certification label. The North American Fenestration Standard, published as AAMA/WDMA/CSA 101/I.S.2/A440, reports air, water, and structural results on one certification line.
What does the structural opening require?
Structural openings for folding doors carry a deflection limit tighter than a standard wall opening. Specifications for a glazed folding system commonly set header deflection at L/600, meaning the beam moves no more than its span divided by 600. A 16-foot header at that limit moves less than one third of an inch. Deflection past the limit binds the panels and drags the track.
Top-hung and bottom-rolling systems load the building differently. A top-hung system suspends every panel from the header track, so the beam above carries the full glass weight. Renovation projects in older New Jersey housing stock often use bottom-rolling hardware, since upgrading an existing header means opening the wall above.
Installation tolerance stays narrow across the whole assembly. ASTM E2112, the standard practice for installing exterior windows and doors, calls for a sill pan with end dams and a back dam under the unit. Out-of-level sills show up immediately in a folding door, because the panels hang in series and a small twist multiplies across the stack.
A specification sequence that prevents rework runs in four steps:
- Record the rough opening, the stack side, and the traffic panel location.
- Fix the sill type against the exterior finish elevation and the drainage path.
- Size the header for the deflection limit and the hardware weight.
- Match the glass to the climate zone U-factor and the site design pressure.
Configuration and threshold reference table
Configuration and threshold pairings follow the exposure and the daily use of each opening. The table sets out common residential combinations in New Jersey.
| Configuration | Typical opening width | Sill that fits | Construction note |
| 2L or 2R | 6 to 8 feet | Weathered or low-profile | Standard header, stack depth under 4 feet |
| 3L or 3R | 9 to 12 feet | Low-profile under cover | Traffic panel keeps daily access simple |
| 2L2R | 12 to 16 feet | Weathered on exposed walls | Both jambs need stack space |
| 3L3R | 18 to 24 feet | Flush with a trench drain | Engineered header, structural review |
What drives the cost and lead time?
Cost on a folding patio door builds from four separate line items rather than one price per foot. Panel count sets the hardware and the labor hours, and sill type sets the drainage and flooring work. The glass package sets the U-factor and the acoustic result, while frame material moves the base price. Quotes returned for folding patio doors nj vary widely because those items get priced separately.
Structural work sits outside most door quotes. Header replacement, a new footing under a stack point, and a trench drain at a flush sill are construction costs. A folding patio doors nj quote that leaves out the sill type and the drainage detail leaves the flooring interface undefined.
Regional supply chains shape lead time more than list prices do. European profile suppliers such as Reynaers, Schüco, and Rehau stand behind many aluminum folding systems sold in New Jersey. Buyers searching for folding patio doors nj reach fabricators who run design, permit drawings, manufacturing, and installation as one chain. Vision Art Aluminium works that way from a Montclair showroom covering New Jersey and New York.
Common mistakes in folding door drawings
Drawing errors on folding door openings repeat in a small set of patterns, and each one surfaces after the frame reaches the site.
- Stack space left off the plan, which parks the folded panels in front of a window.
- Sill type unspecified, so the flooring contractor sets the finished height before the door detail exists.
- Exterior landing poured level with a flush sill, with no trench drain and no slope away from the wall.
- Traffic panel swing drawn from the interior while the manufacturer counts from the exterior.
Which configuration fits which New Jersey opening?
Opening width and exposure decide the configuration faster than style preference does. Openings up to 12 feet work with two or three panels and a low-profile sill on a covered elevation. Openings past 16 feet move to a split stack, an engineered header, and a weathered sill on any exposed wall. Flush thresholds suit projects that can build a trench drain into the slab. Traffic panel placement, stack side, and sill height stay fixed after fabrication.
Product specifications, code editions, and prices change over time. Verify the current New Jersey subcode edition and the local design pressure requirement with the municipal construction office. Confirm the manufacturer’s tested ratings on the product data sheet before ordering.
Frequently Asked Questions
What is a folding patio door?
A folding patio door is a glazed door system whose panels hinge together and stack to one or both sides of an opening. Residential systems run from two to ten panels. The design clears most of the opening, while a sliding door keeps one panel across the width.
Which threshold type handles New Jersey weather?
Threshold performance rises with the height of the upstand. A weathered sill of 2 inches or more resists wind-driven rain on exposed elevations and shore-facing walls. A low-profile sill near 1 inch suits walls under a deep overhang. A flush sill needs a trench drain and positive slope to match either one.
How much stack space does a folding patio door need?
Stack space equals the panel width plus a small allowance for each folded leaf and its hardware. A four-panel system with 42-inch leaves stacking one way projects about 4 feet from the jamb. That depth lands inside the room on an inward stack and on the terrace outside.
Do folding patio doors need a permit in New Jersey?
New Jersey’s Uniform Construction Code requires a construction permit whenever a project creates or enlarges a structural opening. Cutting a wall for a folding door falls under that rule, and a sealed structural detail normally accompanies the application. Municipal construction offices confirm whether a same-size replacement counts as ordinary maintenance.
How does a folding patio door differ from a sliding door?
A folding patio door stacks its panels perpendicular to the wall and clears nearly the entire opening. A sliding door parks panels behind one another and keeps at least one panel across the width. Folding systems carry more hardware, more weather seals, and a heavier header load.

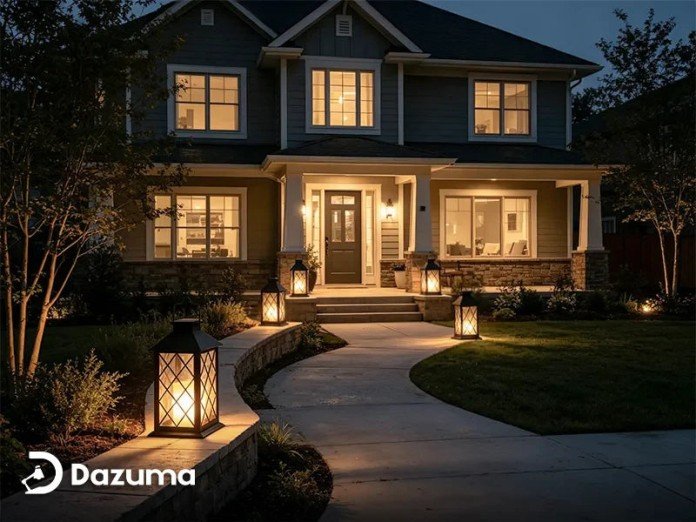
The exterior of a home should remain practical and welcoming after daylight fades. Without suitable lighting, steps become difficult to see, entrances feel less inviting, and architectural features disappear into the darkness. A few carefully selected wall lights can improve visibility while giving the building a more polished appearance.
Outdoor wall lighting is available in many forms, including traditional lanterns, compact downlights, modern up-and-down fixtures, linear sconces, motion-activated lights, and solar-powered designs. Choosing between them involves more than finding a fixture that looks attractive. Homeowners should also consider its purpose, position, brightness, weather resistance, scale, and relationship with the architecture.
Begin with the Purpose of Each Light
Before comparing finishes and shapes, decide what each fixture needs to accomplish. A light beside the front door may need to illuminate locks, house numbers, parcels, and visitors’ faces. A fixture near a side passage should make obstacles easier to see, while patio lighting may focus more on comfort and atmosphere.
Walk around the property after dark and identify areas where visibility is poor. Pay attention to steps, gates, doorways, garage entrances, narrow paths, and changes in ground level. These practical locations should usually be addressed before purely decorative areas.
Next, note the architectural features that deserve attention. Textured brick, natural stone, timber cladding, columns, and carefully designed entrances can all benefit from controlled illumination. When one fixture can support both visibility and architectural emphasis, the lighting plan becomes simpler and more effective.
Match the Fixture Style to the Architecture
A wall light should feel connected to the building rather than attached as an afterthought. Traditional lanterns suit cottages, period properties, and homes with classic doors or decorative masonry. Simple rectangular fixtures complement contemporary exteriors, while industrial-style lights can work well with brick, metal, and converted spaces.
Dazuma’s collection of Outdoor Wall Lighting shows how varied the category has become, with lantern-inspired fixtures, minimalist LED forms, linear sconces, solar options, and up-and-down designs. This variety makes it possible to choose a light that supports the character of the property instead of competing with it.
The fixture does not have to match every exterior detail exactly. Repeating one element—such as a black finish, warm metal tone, rectangular shape, or type of glass—is often enough to create a consistent visual relationship.
Choose the Correct Size
Scale is one of the most common sources of disappointment. A small wall light may look insignificant beside a wide entrance or large garage door. An oversized fixture can overwhelm a narrow doorway and shine into nearby windows.
Consider the dimensions of the wall, door, and surrounding architectural features. A fixture beside a single entrance door should normally remain clearly smaller than the door itself, while a large double entrance may support more substantial lights. Where two matching fixtures are installed on either side of a doorway, each can be slightly smaller because the pair creates a stronger combined presence.
Check the fixture’s projection from the wall as well as its height and width. A deep lantern may interfere with a narrow passage, door swing, downpipe, or garden gate even when its front-facing dimensions appear suitable.
Position Lights at a Comfortable Height
Outdoor wall lights should illuminate useful areas without shining directly into people’s eyes. Fixtures installed beside an entrance are commonly positioned around eye level or slightly above it, but the ideal height depends on the fixture’s proportions, beam direction, door design, and ceiling height.
Ask another person to hold a cardboard template against the wall before drilling. View it from the pavement, driveway, and doorway to judge whether the size and position feel balanced. This simple test can reveal problems that are difficult to recognise from measurements alone.
For up-and-down lights, make sure there is enough clear wall above and below the fixture for the beams to develop. Rooflines, signs, plants, window frames, and other obstructions can interrupt the intended effect.
Control Light Direction and Glare
Brighter lighting is not always better. A powerful unshielded light can make it harder to see by creating glare and deep shadows. The goal is to place light where it is needed while keeping the source as comfortable as possible.
Downward-facing fixtures work well above steps, pathways, and doors because they direct illumination towards the ground. Up-and-down lights produce decorative beams on the wall and can emphasise vertical architecture. Lanterns with diffused or frosted glass provide a softer general glow, while clear glass reveals the bulb and creates a more traditional appearance.
Check the beam from inside the house as well. A badly positioned fixture may shine through bedroom or living-room windows. Adjusting the height, selecting a lower lumen output, or choosing a more controlled beam can prevent unwanted indoor glare.
Select an Appropriate Colour Temperature
Colour temperature describes whether white light appears warm, neutral, or cool. Warm white light generally complements brick, timber, stone, and traditional architecture. It creates a relaxed atmosphere around front entrances, terraces, and garden seating areas.
Neutral white can provide clearer visibility around garages, side passages, and modern façades. Very cool light may appear harsh in residential settings, especially when neighbouring fixtures use a warmer tone.
Consistency matters. Wall lights visible together should usually have the same or closely related colour temperatures. A warm lantern beside a cold blue-white garage light can make the exterior appear disconnected, even when the fixtures are attractive individually.
Look Beyond Wattage When Comparing Brightness
Modern LED fixtures use much less energy than older bulbs, so wattage is no longer the clearest measure of brightness. Compare lumen output instead. A front entrance may need enough illumination for identification and access, while a patio may benefit from gentler light that does not dominate the evening atmosphere.
Also consider how the shade and beam angle affect the perceived brightness. An enclosed diffuser spreads light differently from a narrow directional fixture. Dark wall materials absorb more illumination, while pale surfaces reflect it and can make the same fixture appear brighter.
Dimming can provide useful flexibility in entertaining areas, but the fixture, driver, bulbs, and control must be compatible. Check the product specifications before selecting a dimmer.
Confirm the Weather Rating
Indoor wall lights should never be assumed suitable for exterior use. Outdoor fixtures must tolerate rain, condensation, dust, temperature changes, and prolonged exposure to sunlight. Check the manufacturer’s location or ingress-protection rating and make sure it is appropriate for the intended position.
A light under a deep covered porch experiences different conditions from one mounted on an exposed coastal wall. Properties near the sea also require materials and finishes capable of resisting salt-related corrosion. Powder-coated aluminium, stainless steel, brass, and properly sealed glass are common exterior options, but their suitability depends on construction quality and maintenance.
When researching different materials and styles, broader ranges from Dazuma Lighting can help homeowners compare exterior fixtures alongside other lighting categories and plan a more coordinated scheme.
Consider Motion Sensors and Timers
A motion sensor can be helpful beside a side gate, garage, bin-storage area, or less frequently used entrance. It provides light when someone approaches without leaving the fixture operating throughout the night. However, poor sensor placement may allow passing traffic, pets, or moving plants to trigger it repeatedly.
Choose a model with adjustable detection range, sensitivity, and operating time where possible. Aim the sensor towards the area people actually use rather than towards the street or a neighbouring property.
Photocells and timers offer another approach. A photocell turns the light on when natural light levels fall, while a timer can switch it off later in the evening. Combining automatic control with efficient LEDs can reduce unnecessary energy use.
Plan a Consistent Exterior Scheme
A home may need several types of outdoor light, but they should still feel related. Entrance lanterns, patio sconces, garage lights, and landscape fixtures do not have to come from one collection. They can be coordinated through finish, shape, glass style, colour temperature, or beam character.
Avoid allowing every fixture to compete for attention. Choose one important area—usually the main entrance—as the visual focus. Supporting lights can then use simpler forms or lower brightness levels. This hierarchy gives the exterior depth without making it appear overdesigned.
View the complete plan from the street before purchasing. Consider which lights will be visible together and how they relate to windows, doors, rooflines, and landscaping.
Install Outdoor Fixtures Safely
Exterior electrical work must be protected from moisture and completed with suitable weatherproof components. The mounting surface should be stable, and cable entries must be sealed according to the fixture manufacturer’s instructions. Avoid trapping water behind the fitting or blocking drainage features designed into the product.
If new wiring, circuit alterations, or unfamiliar electrical connections are required, use a qualified electrician. Professional installation is especially important where the wall is exposed to heavy rain, where the existing wiring is old, or where several fixtures and controls are being added at once.
Keep the Lights Performing Well
Outdoor fixtures require occasional maintenance. Clean glass and diffusers so dirt does not reduce light output. Remove cobwebs, check mounting screws, trim plants that block the beam, and inspect the finish for early signs of corrosion.
After storms or freezing weather, confirm that fittings remain secure and that water has not entered the enclosure. Replace damaged seals and failed bulbs with components that match the original specifications.
A Small Change with a Noticeable Effect
Outdoor wall lighting can improve the appearance, safety, and everyday usability of a home without requiring a major renovation. The best results come from understanding the purpose of each fixture, choosing a suitable scale and beam direction, controlling glare, and using materials designed for the installation environment.
With careful placement and a consistent lighting style, entrances become more welcoming, pathways feel easier to navigate, and architectural details remain visible after sunset. The exterior gains character while continuing to serve the practical needs of the people who use it.

Securing Industry 4.0: Mitigating Electrical Transients in Smart Manufacturing

Where to Spot Bears in Alaska: A First-Timer’s Wildlife Guide

Why Smart Factories Need Stable Production Conditions

Small Space, Big Profits: Smart Seating Layouts for Tiny Dining Rooms

8 Workforce Challenges Facing Modern Construction

Who Is Indiana Urban? Inside the Life of Karl Urban’s Son and Rising Actor

Jennifer Seyfried: All About Amanda Seyfried’s Sister, Her Life and Career

Who Is Zachary Hudson? Inside the Private Life of Cindy Williams’ Son

Who Is Stephen G. Walker? All About PinkPantheress’ Father and His Academic Career

Cynthia Womack Biography: The Life, Career, and Legacy of Connie Britton’s Twin Sister
Who Is Indiana Urban? Inside the Life of Karl Urban’s Son and Rising Actor
Jennifer Seyfried: All About Amanda Seyfried’s Sister, Her Life and Career
Who Is Zachary Hudson? Inside the Private Life of Cindy Williams’ Son
Who Is Stephen G. Walker? All About PinkPantheress’ Father and His Academic Career
Cynthia Womack Biography: The Life, Career, and Legacy of Connie Britton’s Twin Sister
-
Biography7 months ago
Who Is Indiana Urban? Inside the Life of Karl Urban’s Son and Rising Actor
-
Biography7 months ago
Jennifer Seyfried: All About Amanda Seyfried’s Sister, Her Life and Career
-
Biography7 months ago
Who Is Zachary Hudson? Inside the Private Life of Cindy Williams’ Son
-
 Biography5 months ago
Who Is Stephen G. Walker? All About PinkPantheress’ Father and His Academic Career
-
Biography7 months ago
Cynthia Womack Biography: The Life, Career, and Legacy of Connie Britton’s Twin Sister
-
 Biography7 months ago
Who Was Gretchen Knauff? The Private Life of Jennifer Coolidge’s Mother
-
 Biography6 months ago
Who is Lynn Levesque? Everything to Know About Triple H’s Sister
-
 Biography6 months ago
Lynn Payne: Inside the Life and Love Story of Randy Savage’s Wife