
Technology
Top 5 AI Photo Enhancers in 2026: Improve Your Images with Smart AI Tools

Photo editing has changed a lot in recent years. Artificial intelligence now helps users improve image quality in seconds without learning advanced editing skills. Whether you want to sharpen blurry pictures, restore old memories, remove noise, or improve image resolution, AI photo enhancers make the process easier than ever.
In 2026, many AI tools offer powerful image enhancement technology. Some focus on privacy, while others provide advanced editing options for professional creators. This article introduces the top 5 AI photo enhancers in 2026, including Vidmud Photo Enhancer, a growing solution known for simplicity and privacy protection.
1. Vidmud Photo Enhancer
Vidmud Photo Enhancer has become one of the most convenient AI-powered image enhancement tools available today. The platform focuses on fast performance, privacy security, and ease of use.
Many users prefer complicated software less than simple browser-based solutions. Vidmud removes unnecessary steps and allows image enhancement directly online.
Key Features
- No Signup Required – Users can enhance photos instantly without creating an account.
- Free to Use – Core enhancement features are available without cost.
- No Data Saved – Uploaded photos are not permanently stored.
- Privacy Secured – User information and images remain protected.
- AI-powered image sharpening
- Resolution improvement technology
- Noise reduction support
- Portrait enhancement capabilities
- Fast cloud-based processing
Vidmud works especially well for social media images, personal photographs, and old picture restoration. Since users do not need registration, the process stays quick and simple.
Best For
People who want secure and private image enhancement without downloading software.
2. Remini
Remini continues to be a popular AI photo enhancer in 2026. The application specializes in restoring low-quality images and improving facial details.
Many users rely on Remini to restore old family photographs or sharpen blurry smartphone pictures. The AI technology analyzes image details and rebuilds lost quality automatically.
Key Features
- Face enhancement technology
- Old photo restoration
- AI sharpening tools
- Video enhancement support
- Mobile-friendly application
Remini performs especially well when improving portraits. Content creators and casual users often choose it for fast image restoration.
Best For
Users who want stronger portrait improvement and old image recovery.
3. Let’s Enhance
Let’s Enhance remains a trusted name in AI image upscaling. The platform focuses on increasing image resolution while maintaining visual quality.
Graphic designers and online store owners often use this tool because product images benefit significantly from AI upscaling.
Key Features
- AI image enlargement
- Resolution improvement
- Color enhancement system
- Batch processing options
- Printing optimization tools
The software works effectively for marketing materials, digital artwork, and ecommerce photography.
Best For
Businesses and designers needing larger high-quality images.
4. Fotor AI Photo Enhancer
Fotor combines traditional editing capabilities with AI enhancement technology. The platform offers a complete editing experience for users wanting both automation and manual control.
Its AI enhancement system helps improve brightness, detail clarity, and image sharpness quickly.
Key Features
- One-click AI enhancement
- Background editing tools
- Portrait retouching
- Color correction options
- Online and desktop compatibility
Fotor works well for creators who need additional editing functions beyond image enhancement.
Best For
Users seeking an all-in-one photo editing platform.
5. Upscale.media
Upscale.media focuses heavily on AI image enlargement and quality improvement. The system automatically enhances image clarity without requiring technical editing knowledge.
Its straightforward workflow appeals to beginners and professionals alike.
Key Features
- AI upscaling technology
- Noise reduction
- Image sharpening
- Simple drag-and-drop workflow
- Fast cloud processing
Users can improve older images, social media photos, and business graphics with minimal effort.
Best For
People needing quick image quality improvements with minimal editing experience.
How AI Photo Enhancers Work
AI photo enhancers use machine learning algorithms trained on millions of images. These systems identify image problems and automatically improve visual quality.
Common enhancement improvements include:
- Increasing image resolution
- Removing blur
- Reducing noise
- Restoring facial details
- Improving brightness and contrast
- Enhancing colors
- Repairing damaged photographs
Modern AI tools save time compared to traditional editing software because users no longer need advanced technical knowledge.
Choosing the Right AI Photo Enhancer
The best AI photo enhancer depends on individual requirements.
Choose Vidmud Photo Enhancer if you value:
- Free access
- No signup requirements
- Privacy protection
- No saved image data
- Fast enhancement process
Choose specialized tools if you need advanced editing workflows or business-focused image optimization.
Privacy also matters more than ever in 2026. Users increasingly prefer services that avoid storing uploaded images. This makes privacy-focused platforms increasingly attractive.
Final Thoughts
AI image enhancement technology continues improving rapidly in 2026. Users now have access to smarter tools that deliver professional-quality improvements in seconds.
Among today’s options, Vidmud Photo Enhancer stands out because it combines convenience with security. Features like No Signup Required, Free Access, No Data Saved, and Privacy Secured create a user-friendly experience without unnecessary complications.
Meanwhile, tools like Remini, Let’s Enhance, Fotor, and Upscale.media offer valuable alternatives depending on specific editing goals.
Whether restoring old memories, improving social media content, or upgrading professional visuals, AI photo enhancers help users create sharper and more impressive images faster than ever before.

Experiencing lag during an exciting game or dealing with screen stuttering and frame drops is extremely frustrating. Modern games are increasingly demanding, and many players struggle to enjoy a smooth gaming experience due to outdated equipment. Fortunately, there are two effective solutions for boosting game performance without spending a lot of money: Game Booster and FPS Booster technologies.
These optimization tools help you make the most of your existing setup and provide a more stable gaming experience.
Why Games Slow Down Over Time
Many users believe that poor performance stems solely from old hardware. In reality, the operating system collects various background programs, startup apps, temporary files, and update processes that drain valuable resources.
Once a game launches, it competes with these applications for CPU cycles, RAM, and access to storage. This competition often leads to lower performance, slower load times, and inconsistent frame rates.
By using Game Booster software, you can temporarily limit activities unrelated to gaming, allowing for a better experience.
How Game Booster Prioritizes Gaming Resources
Game Booster acts as a performance manager for your computer. It identifies unnecessary apps and services during gaming sessions and suspends or reduces their resource usage.
This enables the game to receive priority from the operating system, allowing the processor and memory to focus on rendering graphics, processing player input, and maintaining smooth gameplay.
This optimization happens automatically, providing better performance without requiring complex system adjustments.
FPS Booster and Frame Rate Stability
High average frame rates are impressive, but consistency is equally important. Games that fluctuate between high and low FPS can feel less smooth than those that maintain a steady rate.
FPS Booster technology aims to reduce these fluctuations by improving communication between hardware components and optimizing graphic workloads. It helps produce frames at a more consistent rate, leading to smoother camera movements and faster controls.
This results in a better gaming experience.
Advantages in Competitive Gaming
Multiplayer games demand quick reflexes and precise timing. A match can hinge on the tiniest delay.
More consistent and higher FPS leads to lower input latency, meaning that players’ actions appear on screen more quickly. This improvement is especially noticeable in shooting games, racing simulations, and fast-paced action games where accuracy is crucial.
Optimization can provide esports players with a competitive advantage.
Better Performance for Content Creators
Gaming performance is essential for both players and content creators, including streamers. Playing or broadcasting live streams uses extra system resources, which can impact frame rates.
Game Booster and FPS Booster tools can help manage these resources, ensuring that gameplay remains smooth even during intense sessions while still allowing for high-quality content production.
The Future of Gaming Optimization
As more games utilize hardware capabilities, the need for optimizing software will increase. Smart resource management and tuning systems are likely to play a larger role in ensuring consistent gaming experiences across various hardware setups.
Conclusion
Game Booster and FPS Booster solutions provide cost-effective and efficient ways to optimize gameplay. These tools enable gamers to achieve smoother visuals, quicker response times, and a more enjoyable overall experience without requiring immediate hardware upgrades by managing resource use and maximizing frame rates.
Cycling is not just a mode of transportation—it’s a lifestyle, a fitness routine, and for many, a passion. However, safety should always come first, especially when riding in low-light conditions or at night. One of the most essential safety accessories for any cyclist is a rear bike light, also commonly known as a bike tail light. This simple yet powerful device can significantly reduce the risk of accidents and make your ride safer and more enjoyable.
Why a Rear Bike Light is Essential
A rear bike light plays a crucial role in ensuring that you are visible to drivers, pedestrians, and other cyclists. Unlike front lights that help you see the road ahead, a bike tail light ensures that others can see you from behind. This is particularly important in urban environments where traffic is dense and unpredictable.
Many accidents involving cyclists occur because drivers fail to notice them in time. A bright and properly positioned rear bike light can alert drivers to your presence from a distance, giving them enough time to react. Whether you are commuting to work, going for a night ride, or cycling in foggy weather, a bike tail light is not just an accessory—it is a necessity.
Types of Bike Tail Lights
There are several types of bike tail lights available in the market, each designed to meet different needs and preferences. Understanding these types can help you choose the best rear bike light for your riding style.
LED Rear Bike Lights
LED lights are the most popular choice due to their brightness, energy efficiency, and long lifespan. They provide excellent visibility and are available in various brightness levels. Most modern bike tail lights use LED technology because it offers reliable performance in all conditions.
Rechargeable Bike Tail Lights
Rechargeable rear bike lights are convenient and eco-friendly. Instead of replacing batteries, you can simply charge them using a USB cable. These lights are cost-effective in the long run and are ideal for daily commuters.
Battery-Powered Tail Lights
Battery-powered bike tail lights are still widely used. They are easy to replace and often more affordable upfront. However, you need to keep spare batteries with you to avoid getting stuck without light during a ride.
Smart Bike Tail Lights
Smart rear bike lights come with advanced features such as automatic braking sensors, turn signals, and connectivity with mobile apps. These lights can increase your safety by providing additional signals to other road users.
Key Features to Look for in a Rear Bike Light
When choosing a rear bike light, there are several important features to consider to ensure maximum safety and performance.
Brightness and Visibility
The brightness of a bike tail light is measured in lumens. A higher lumen count means a brighter light. For city riding, a light with at least 20–50 lumens is recommended, while for darker roads, you may need even more brightness.
Light Modes
Most rear bike lights offer multiple modes such as steady, flashing, and pulsing. Flashing modes are particularly effective in grabbing attention, while steady modes provide consistent visibility.
Battery Life
Battery life is another crucial factor. A good rear bike light should last several hours on a single charge or set of batteries. Rechargeable lights often display battery levels, which helps you plan your rides better.
Mounting System
A secure and easy-to-install mounting system ensures that your bike tail light stays in place even on rough roads. Look for lights that can be easily attached and removed without tools.
Water Resistance
Since cycling often involves exposure to different weather conditions, a waterproof or water-resistant rear bike light is essential. This ensures that your light continues to function even in rain or fog.
Benefits of Using a Bike Tail Light

Using a bike tail light offers several advantages beyond just visibility.
Firstly, it increases your safety by making you more noticeable to others on the road. Secondly, it gives you confidence while riding in low-light conditions, allowing you to focus on your journey rather than worrying about being seen. Thirdly, in many countries, using a rear bike light is a legal requirement, so having one helps you stay compliant with traffic laws.
Moreover, modern bike tail lights are lightweight, compact, and stylish, adding to the overall look of your bike while enhancing safety.
How to Properly Use a Rear Bike Light
To get the most out of your rear bike light, proper usage is important. Always position the light at the back of your bike, preferably on the seat post or rear rack. Make sure it is angled correctly so that it is visible to traffic behind you.
Use flashing mode in busy areas to attract attention, and switch to steady mode on dark roads where consistent illumination is needed. Regularly check the battery level and ensure that your light is functioning properly before every ride.
Tips for Choosing the Best Rear Bike Light
When selecting a bike tail light, consider your riding habits. If you ride daily, invest in a high-quality rechargeable light. If you occasionally ride at night, a basic battery-powered light may be sufficient.
Also, consider the environment in which you ride. For urban areas, a bright flashing light is ideal, while for rural or poorly lit roads, a combination of steady and high-lumen lighting works best.
Reading reviews and comparing features can also help you make an informed decision. A good rear bike light is an investment in your safety, so it’s worth choosing wisely.
Conclusion
A rear bike light, or bike tail light, is one of the most important safety tools for any cyclist. It enhances visibility, reduces the risk of accidents, and provides peace of mind during your rides. With various options available, from basic LED lights to advanced smart systems, there is a perfect bike tail light for every rider.
Investing in a high-quality rear bike light is a small step that can make a big difference in your cycling safety. Whether you are a beginner or an experienced cyclist, never underestimate the importance of being seen on the road. Stay safe, stay visible, and enjoy every ride with confidence.
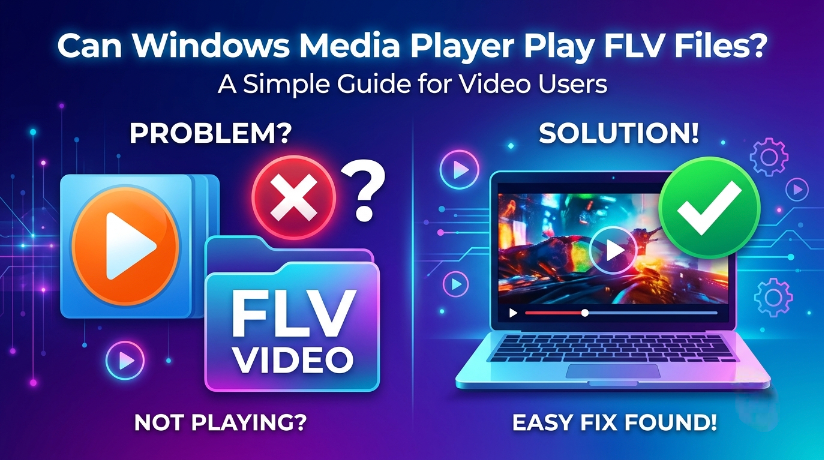
FLV was once one of the most common video formats on the web, especially when Flash-based video players were popular. Many older websites, downloads, and saved clips still use the FLV format. The problem is that modern media players and devices have moved toward formats like MP4, MOV, and WebM, which are easier to play across phones, computers, browsers, and smart TVs.
Windows Media Player may play some FLV files if the correct codec is already installed on the system, but it does not always support FLV smoothly by default. This is why one FLV file might open without trouble while another shows an error, plays only audio, or refuses to load completely.
Can Windows Media Player Play FLV by Default?
In most cases, Windows Media Player is not the best choice for FLV playback. FLV is an older Flash Video container, and support depends on your Windows version, installed codecs, and how the original video was encoded. If the file uses unsupported video or audio settings, Windows Media Player may not understand it properly.
That does not mean the FLV file is damaged. It usually means the player does not have the right support for that specific file. This is a common issue with older formats because video compatibility depends on more than the file extension.
For example, two files can both end with .flv, but one may use video and audio settings that your system can read, while the other may use settings that are not supported. This is why users often get confused when one FLV file works and another does not.
Why FLV Files Became Less Common
FLV became popular during the time when Adobe Flash was widely used for online videos. Many websites used Flash players to stream videos directly inside browsers. At that time, FLV was a practical format because it worked well with Flash-based web video.
Today, Flash is no longer the standard for online video. Modern browsers, video platforms, phones, and media players mostly use newer formats. MP4 is now one of the most common choices because it is easy to play, easy to upload, and supported almost everywhere.
This shift is one reason FLV files can feel outdated. The file may still contain valid video, but the software around it has changed. Many apps and devices are no longer designed with FLV support as a priority.
Common Reasons FLV Files Do Not Play
There are several reasons why an FLV file may not open in Windows Media Player. The first reason is missing codec support. A codec is the technology used to compress and decode video or audio. If Windows Media Player does not have the right codec, it cannot read the file properly.
Another reason is file corruption. If the FLV file was downloaded incompletely, transferred badly, or stored on a damaged drive, it may fail to open. In this case, even another media player may have trouble playing it.
A third reason is outdated software. Older versions of Windows Media Player may have fewer compatibility options. Even if your system can handle many common video files, older or less common formats like FLV may still create problems.
Sometimes the issue is not the video stream but the audio stream. The file may open, but you may hear no sound. Other times, the sound plays but the video stays black. These are signs that Windows Media Player is able to read only part of the file.
Is the FLV File Bad If It Does Not Open?
Not always. If Windows Media Player cannot play an FLV file, it does not automatically mean the file is broken. In many cases, the file is fine, but the player simply does not support the format or codec combination.
This is important because many users delete old videos too quickly, thinking the file is useless. Before doing that, it is better to try another method. You can test the file in another media player, check if the file size looks complete, or convert the file into a more compatible format.
If the file is important, such as an old recording, business video, saved tutorial, or personal memory, converting it is usually a safer option than trying random fixes.
Best Way to Make an FLV File Play Smoothly
The easiest solution is to convert the FLV file into a more modern format such as MP4. MP4 works well with Windows Media Player, mobile phones, editing apps, browsers, and most sharing platforms. If you want a quick online option, Ahaconvert is one of the tools you can use for simple video conversion without making the process complicated.
For FLV-specific conversion, using an FLV Converter is usually the cleanest route. Upload the FLV file, choose an output format like MP4, and download the converted version once the process is complete.
This approach is useful because it solves the compatibility problem directly. Instead of trying to force Windows Media Player to understand an older format, you change the file into a format that Windows Media Player and most other apps already support.
Why MP4 Is Usually the Best Output Format
MP4 is one of the safest choices when converting FLV files. It is widely supported on Windows, Mac, Android, iPhone, smart TVs, tablets, browsers, and social media platforms. If your goal is simple playback, MP4 is usually the most practical option.
MP4 also works well for sharing. If you need to send a video to someone, upload it to a website, attach it to a project, or edit it in common software, MP4 will usually create fewer problems than FLV.
Another benefit is long-term usability. FLV is an older format, and support may continue to decline over time. MP4 is still widely used, so converting old FLV files to MP4 can help keep them accessible in the future.
Should You Install Codecs Instead?
Some users try to install codec packs to make Windows Media Player open FLV files. This can work in some cases, but it is not always the best choice. Codec packs may add support for more formats, but they can also create confusion if you install the wrong package or download from an unsafe source.
For most everyday users, converting the file is simpler and cleaner. You do not need to change your system settings or install extra playback components. Once the FLV file is converted to MP4, you can play it almost anywhere.
If you work with many old video formats regularly, using a strong media player or codec setup may make sense. But for a normal user who only has a few FLV files, conversion is usually easier.
Tips Before Converting FLV Files
Before converting, make sure the FLV file is complete. If the file size is very small or the download was interrupted, the conversion may fail. If possible, open the file in another player first to confirm that the video is readable.
Also, avoid converting the same file many times. Every time a video is re-encoded, there is a chance of quality loss. It is better to convert once from the original FLV file and save the MP4 version.
Choose an output quality that matches the original file. If the FLV file is low resolution, converting it to a very high resolution will not magically improve it. It may only make the file larger. A good conversion keeps the video clear without creating an unnecessarily huge file.
Should You Keep FLV or Convert It?
If you only need to store the file as an archive, keeping the original FLV is fine. But if you want to watch, edit, upload, or share the video, converting it to MP4 is more practical. MP4 gives you better compatibility and fewer playback problems.
A smart approach is to keep the original FLV file as a backup and also create an MP4 version for daily use. This way, you preserve the original file while still having a version that works easily on modern devices.
This is especially useful for old videos that matter to you. If the file contains personal memories, old website content, training material, or business media, having a modern copy makes it easier to protect and reuse.
Final Answer: Can Windows Media Player Play FLV Files?
So, can Windows Media Player play FLV files? Sometimes, yes. But if you want a reliable experience, converting FLV to a widely supported format is usually the better choice.
Windows Media Player may support some FLV files depending on codecs and system setup, but it is not the most dependable option for this format. FLV is older, less common today, and more likely to create playback issues on modern devices.
If the FLV file does not play, the simplest solution is usually to convert it to MP4. That gives you smoother playback, better compatibility, and easier sharing without dealing with codec problems.

From Lag to Victory: How Game Booster and FPS Booster Transform Your Gaming Experience

Why Your Roof Deserves Better Than “Good Enough”

The Smart Investment Hiding Right Above Your Head

The Real Cost of Ignoring Furnace Repair

The Smart Way to Protect Your Home Starts on Top
Who Is Indiana Urban? Inside the Life of Karl Urban’s Son and Rising Actor
Jennifer Seyfried: All About Amanda Seyfried’s Sister, Her Life and Career
Who Is Zachary Hudson? Inside the Private Life of Cindy Williams’ Son
Cynthia Womack Biography: The Life, Career, and Legacy of Connie Britton’s Twin Sister

Who Is Stephen G. Walker? All About PinkPantheress’ Father and His Academic Career
Who Is Indiana Urban? Inside the Life of Karl Urban’s Son and Rising Actor
Jennifer Seyfried: All About Amanda Seyfried’s Sister, Her Life and Career
Who Is Zachary Hudson? Inside the Private Life of Cindy Williams’ Son
Cynthia Womack Biography: The Life, Career, and Legacy of Connie Britton’s Twin Sister
Who Is Stephen G. Walker? All About PinkPantheress’ Father and His Academic Career
-
 Biography4 months ago
Who Is Indiana Urban? Inside the Life of Karl Urban’s Son and Rising Actor
-
 Biography4 months ago
Jennifer Seyfried: All About Amanda Seyfried’s Sister, Her Life and Career
-
 Biography3 months ago
Who Is Zachary Hudson? Inside the Private Life of Cindy Williams’ Son
-
 Biography4 months ago
Cynthia Womack Biography: The Life, Career, and Legacy of Connie Britton’s Twin Sister
-
 Biography2 months ago
Who Is Stephen G. Walker? All About PinkPantheress’ Father and His Academic Career
-
 Biography4 months ago
Who Is Miley Crews? Inside the Life of Naomi Burton-Crews’ Daughter and Terry Crews’ Granddaughter
-

 Biography3 months ago
Who Is Tauã Baccarin? All You Need to Know About Morena Baccarin’s Family Life
-
 Biography4 months ago
Who Was Gretchen Knauff? The Private Life of Jennifer Coolidge’s Mother